Журнал прохождение игры phantasy star 2.
- As a standard rule in just about all RPGs, you should: (A.) talk to everyone you meet, and (B.) Save your game every chance you get. Most of the people of Motavia have information to pass along, but you"ll have to speak with them to obtain it! And though it may seem obvious, you should Save your game frequently. As I said before, PS2 is a bit on the difficult side, and you don"t want to have to repeat something you"ve already worked hard to accomplish. Later in the game you may obtain an item that lets you Save your adventure anywhere, so make use of it... frequently!
- As another standard rule in most RPGs, building levels is very important, especially in PSII. By fighting monsters, you will gain Experience Points and Meseta (money). Once you obtain enough EXP, you will gain a level, and your statistics such as HP, strength, and defense will increase. In addition, you will need the Meseta you obtain from battles to purchase better equipment which will be essential to your survival, as well as items and medicine to keep you in good condition. Therefore, you should try to fight as many battles as possible... use the "Run" command sparingly, in case you are hurt bad and need to escape, or are truly in a hurry (though most of the time, running from the enemy proves to be a bit tough).
- You should try to carry around as much medicine as you can on your trips through the dungeons. Most dungeons are quite large, and you may need to save your TP for tougher battles rather than for healing. By using medicine, you can heal yourself while at the same time conserving your TP.
- Only the people currently in your party gain EXP from battles. The others will stay at Rolf"s house until you need them, but they won"t gain EXP. Thus, it is important to use each of your characters as they are better suited for different situations. If you let one character sit at Rolf"s house forever, they won"t get any stronger, and thus will become useless (or very very weak) until you build their levels. Though you can go through the game using the same party, you"ll soon find your options with your other characters grow very limited. It"s really a matter of preference, but I recommend at least building up each character to a reasonable level.
- Some items have distinct effects when used in battle. Some may cast a technique at an enemy, while others may heal your party. It is advantageous to make use of these items during battle. It may be a good idea to have a weaker party member use these items to either harm the enemy or heal your allies, rather than attacking. This will also help you save TP, and you can use the item as many times as you want, though they can only be used in battle. Take advantage!
- There are a wide variety of techniques that each of the characters may learn, though the effects of some are less obvious than others. Some techniques that paralyze, silence, or put the enemy to sleep may seem useless at first, but during a particular battle these may be your most powerful weapons. Thus, it is a good idea to familiarize yourself with your techniques and know which situations in which to use them!
- Most of the equipment in the towns in PSII is pretty expensive, and if you want to buy it all, you"ll have to spend LOTS of time building up meseta. I recommend only buying equipment for the characters that you are planning on using for the current task, as it takes quite a long time to buy the best equipment for all characters. For the sake of making this guide, I spent time doing that, but this doesn"t mean you have to. This is one reason why my levels are probably higher than most people"s.
Controlling Yourself
Before playing, it"s probably a good idea to know how to work the controls. Though it isn"t really all that difficult...
Controls: Use the Control Pad to move around in the four cardinal directions. Use the A button to speak to people or open chests. The B button serves as your "Cancel" button to exit menus or shops. The C button is your "accept" button, use it to select menu items or bring up the menu itself.
 The in-game menu
The Menu consists of five items.
- Item: Shows the inventory of each character. Each character can carry up to 16 items with them. You can also manipulate your characters" items.. meaning USE them, GIVE them to other characters, or DROP unwanted (or un-needed) items.
- State:
Brings up another small menu....
- State: A "quick-status" display of sorts, STATE shows the Name, Level, and HP/TP of your current party members.
- Order: Allows you to change the formation of your party.
- Tech: Brings up a list of the field techniques that each character knows. Battle techniques aren"t shown here. You can simply view them, or you can use one by moving the cursor next to it and pressing the C button.
- Strength: This command brings up a detailed status display of the character, which shows all aspects of their progress, such as Level, EXP, HP/TP, Strength, Defense, etc. It also shows you a list of the battle and field techniques the character knows, and the items he or she currently has equipped.
- Equip: This command manages your equipment... you can wear or remove equipment from your characters. Remember, just possessing weapons and armor won"t help you a bit... you"ll have to equip them first! Note that not all characters can use all weapons and armor... most characters are quite limited as to the stuff they are allowed to equip.
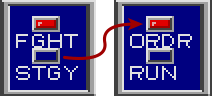
Battle: Once battle starts, you will have two options to choose from.
- Fight: Starts combat. Each character will attack with the option you have chose for them. Once the round of combat is over, the next round of combat will start immediately. If you wish to issue new commands next round, press the B button before the current round of combat terminates.
- Strategy: Brings up another menu...
- Order: Allows you to set up what you want each character to do. You may choose to have them attack a particular enemy (instead of choosing one at random), use a technique, use an item, or defend (increases defense for the combat round but the character won"t be able to do anything else).
- Run: With this command you will try to escape from the encounter. It won"t always work (in fact, a lot of the time it won"t work), but it is useful if you are hurt bad and need to get back to a town quickly.
And that"s about it! Now, on with the walkthrough!
The Journey Begins
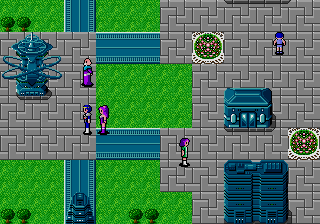 By the Central Tower in Paseo
The opening sequence consists of a short monologue in which Rolf explains a strange and recurring nightmare he has been having. A young girl (resembling Alis from Phantasy Star I?) is battling against a demon. Though Rolf is nearby, he cannot move or speak and he can only watch as the demon continues to strike at the girl. However, just before the monster issues its death blow, Rolf awakens.
After the sequence, Rolf will automatically travel to the Central Tower and meet with the governor. The governor will explain about an accident that recently occurred at the Bio-Systems Lab, and issues Rolf with the assignment of investigating this accident, and returning with the Recorder, which might be able to explain the cause of the accident. As Rolf goes back home to prepare for his journey, his girlfriend Nei insists on going with him. Nei is a hybrid of a human and a bio-hazard who mysteriously appeared about seven months ago. Nei is adamant on going with Rolf, so he reluctantly decides to take her with him. You can now wander around and explore the capital city of Paseo.
Town of Paseo Map
| Item Shop | |
|---|---|
| Monomate | 20 |
| Dimate | 60 |
| Antidote | 10 |
| Telepipe | 130 |
| Escapipe | 70 |
| Weapon Shop | |
|---|---|
| Knife | 100 |
| Dagger | 200 |
| Scalpel | 180 |
| Steel Bar | 80 |
| Bow Gun | 300 |
| Sonic Gun | 640 |
| Armor Shop | |
|---|---|
| Headgear | 120 |
| Carbonsuit | 128 |
| Carbonvest | 120 |
| Fibercoat | 300 |
| Carbon Shield | 540 |
| Carbon Emel | 420 |
Since Rolf starts out with only 200 Meseta, it"s obvious you won"t be able to purchase everything just yet. Start out by buying 2 Steel Bars for Nei, and don"t forget to equip them! Then explore Paseo and speak with its inhabitants. The Bio-Systems Lab is to the west, and to get through we"ll have to cross through the North Tunnel, but currently here is a robber named Darum plaguing the tunnel. We"ll have to figure out a way to get rid of him before we can cross. For now, our target is Arima, the town nearest to Paseo. But first, head out of Paseo, and walk around in the vicinity fighting monsters. Since Rolf and Nei start out at level 1 (i.e very weak), the monsters around here will be tough enough for the time being. Hang around and fight monsters for a while, gaining EXP and Meseta, and be sure to go back to the Hospital in Paseo when your HP/TP start running low. If Rolf or Nei gets killed you"ll have to visit the Clone Lab to bring them back to life.
I recommend fighting monsters around Paseo until Rolf"s level reaches 4 (since Nei levels roughly twice as fast as Rolf, she will probably be around level 7 or so by this time... though Nei levels fast, her levels don"t affect her as much). By this time you should have acquired enough Meseta to purchase the rest of the needed equipment from Paseo... another Knife for Rolf, and a Headgear and Fibercoat for Rolf as well. Shields aren"t really all that useful in PS2, as the other hand is better suited for an additional weapon... or sometimes you may need both hands free to wield a sword or other powerful weapon. Again, it"s a matter of preference.... if you"d rather have the extra defense instead of another Knife (even though defense doesn"t seem to have all that great of an effect in this game), you may want to save up for a Carbon Shield.
Once you"re ready to proceed, our first stop is the town of Arima, which is a short ways to the northeast of Paseo. To get there, first walk through the tunnel north of Paseo, then continue north across the bridge. To the west you"ll see the North Tunnel where the robber Darum is hanging out... you won"t be able to go through there just yet. Instead, walk around the trees and cross another bridge, and soon you"ll reach Arima.
Town of Arima Map
| Weapon Shop | |
|---|---|
| Dagger | 200 |
| Steel Bar | 80 |
| Sword | 1200 |
| Ceramanic Knife | 2800 |
| Sonic Gun | 640 |
| Shotgun | 800 |
Arima is in pretty bad shape, as you"ll see as you walk around the town. A group of villains (referred to as the "scoundrels") have blown up most of the houses and killed off all the men, so the only people left are women, children, and the elderly. You"ll also learn that the "scoundrels" have a hideout in a building known as Shure, to the northeast of Arima. Also, you"ll learn a bit about Darum... before Arima was attacked he lived happily with his daughter Teim, yet when the "scoundrels" attacked, Teim was kidnapped and Darum was forced to turn to robbery to pay the ransom. It"s apparent that in order to cross the North Tunnel we"ll have to get rid of the villians, rescue Teim, and bring her back safely to Darum.
After exploring the town, head back to Paseo. All the companions who join you throughout the course of the game will show up at Rolf"s house after you complete a certain event (usually, once you reach a new town). Therefore, whenever you reach a new town, it"s a good idea to go back to Rolf"s house and check for new companions. Although you can use the Teleport Machine to get back to Paseo quickly, it costs 60 Meseta and you have better things to do with the money at this point. Besides, you need the EXP anyway. :P
Back at Rolf"s house you will meet your first companion, Rudolf, the Hunter. Rudolf (or Rudo for short) is a professional hunter who is VERY strong and can use big guns with ease, though is incapable of using any techniques. Still, he will prove to be a very valuable party member throughout the game. After the introduction, don"t forget to add Rudo to your party by selecting "Reorganize", then add Rudo to the roster. Now we have three fighters... much better, eh? :)
*NOTE* In addition to which members you currently have in your party, your party order is also important. Members near the front of the row will be more likely to sustain attack, while members near the back will be less likely to be attacked. Therefore, it"s a good idea to place members with HP and Defense (such as Rudo) at the front of the party. I recommend changing your party order to Rudo, Rolf, then Nei.
Now Rudo is in our party, but (like all companions) he starts at level 1, so he could stand to gain some EXP. Head back to Arima, then cross the bridge to the east to reach some slightly tougher monsters. You"ll want to stick around in this area and fight more monsters for a while, both to gain EXP and Meseta to buy some of the new equipment available in Arima. The only enemy you will really need to watch out for is the Armorant. They usually come in groups of 3, and are quite tough, having 23 HP and capable of dealing 5-6 HP damage per attack, and also capable of paralyzing a character. It would be a good idea to have Rolf use Foi (at level 5 Rolf will learn Gifoi and Tsu, but each takes up 6 TP compared to 2 TP from Foi, and each deals only about twice as much damage) against them, to be on the safe side. Each Armorant gives 26 EXP and 34 Meseta, so these will help you gain levels and meseta fast!
Once Rolf reaches level 7, you should have enough Meseta to head back to Arima and buy a Sword for Rolf, and a new weapon for Rudo. Here is another matter of preference... you may choose to either buy two Sonic Guns for Rudo, or one Shotgun. The two Sonic Guns will do more combined damage than the Shotgun, but the Shotgun is capable of hitting more than one enemy in a monster group (the Shotgun will typically hit all enemies to the right of the one that is shot. However, the damage will be spread out amongst the enemies... each one won"t take full force from the shot). Note that the Sword takes up two hands, so you"ll have to sacrifice your shield if you have one equipped. If you really want the shield, you may want to keep your two knives (the Ceramic Knives are too darn expensive to bother with right now) instead. I got a Sword for Rolf and two Sonic Guns for Rudo.
Then, you should also go back to Paseo both to sell off your old equipment, and stock up on medicine (since Arima conveniently lacks a Tool Shop). I recommend buying as many Dimates as you can afford, as even the first dungeon will prove to be quite a bit difficult! I also recommend buying an Escapipe... though by the time you Rolf reaches level 7 he will have techniques to both escape dungeons and teleport back to town (basically the functions of the Escapipe and Telepipe), it"s good to have at least one on hand in case you use up all of Rolf"s TP. If you are stuck in a dungeon and hurting, and Rolf runs out of TP, it may save your life!
Once you"re ready, our next target is the abandoned building known as Shure, located to the northeast of Arima. Shure is the hideout of the "scoundrels", so we may be able to find some information about Darum"s daughter there. To get there, head east of Arima, and cross the bridge. Then walk north and east around the trees, and you"ll find Shure at the northern end of the peninsula.
Darum
Shure Map
| My Level | Rolf L7, Rudo L6, Nei L13 |
| Items | Monomate, 390 Meseta, Dynamite x2, Dimate, Headgear, Sil Ribbon, Letter, Small Key |
| Monsters | Bee, Mosquito, Fire Ant, Poisoner, Locust, Froggy, Armorant, Spinner, Carrier, Amoeba, Pulser, Waspy, Buzzer |
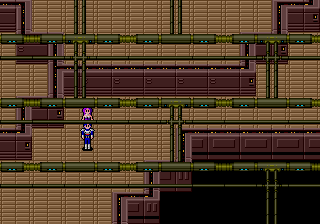 Inside Shur Dungeon
As I said before, for a first dungeon Shure is rather difficult. It consists of four medium-sized floors, and the monsters on the top floors are a bit more difficult than the ones we"ve fought previously. Keep those Dimates ready. :)
The first floor is rather simple. From the entrance, walk to the left, around the outside of the building. This path leads all the way around, so continue to follow it until you reach the northeast corner of the first floor. You"ll see boxes in each of the four corners as you make your way around... ignore those for now, as they are accessed from the floor above. Once you reach the east side of the first floor, the path will cut to the left, leading towards the center of the floor. Go left, but be sure to grab the box to the south, which contains 40 Meseta. Then head for the center, and step on the chute to go up to the second floor.
On the second floor, walk south along the narrow passage until you reach an open area. Like the first floor, the second floor consists of four distinct "corners" in which there is one chute leading up and one chute leading down. The four chests on the first floor are locked, so they are inaccessible until we can find a key. For now, head the south-west corner, and pick up the box to obtain another Dimate. Now take the chute leading up to the third floor. Walk right a little ways and you"ll see an opening to the north. Go north through this opening and walk straight until you reach another box. Open it to obtain a Headgear. Now go back and take the chute back down to floor two.
Exit the south-west corner, and now head for the north-west corner, then continue right along the north edge of the building to reach the north-east corner. Take the chute leading up to go back up to floor three, Walk to the east then south along the passage, and soon you"ll reach a large pit that exists in the center of the floor. Try not to fall down into it, if you do it will dump you back down to the floor below, and you"ll have to make your way all the way back up here.
Before crossing the pit, walk south along it"s edge and you"ll find a box containing 200 Meseta down in a little nook at the bottom. Take this, then go back to the narrow bridge leading across the pit. After crossing, you"ll end up along the north wall. Walk east along the passage and it will lead you down to the south-east corner of this floor. Nearby is the chute leading up to the top floor... this is where you want to go.
On the top floor, you"ll notice a couple of bodies lying around... these are the bodies of the "scoundrels"! The bio-hazards that invaded the hideout probably killed them. One of the bodies has the key that we are looking for, and as you probably guessed, it"s the most difficult to get to. From the chute leading back down, walk to the north up against the wall, then head due west to find a box containing a Sil Ribbon... a better piece of head protection for Nei that should be equipped immediately. Make your way back to the chute again, and you"ll see a body a bit to the west and south.
From this body, walk a few steps south, then west along this long passage that winds through the entire west section of the floor. At the end of the passage, you"ll finally reach the dead body that contains the Small Key, as well as a Letter. The Letter is a ransom note from the "scoundrels" to Darum, stating that Teim has been locked away in Nido Tower, and that Darum must pay a ransom of 50,000 Meseta to get her back. Nido Tower is a building to the southeast of Shure, but the entrance is blocked, so we"ll need something to get in. In Arima you learned that the "scoundrels" used dynamite to blow up the houses, and they still probably have a few sticks left. Perhaps in the locked chests...?
At this point you have a choice. You can either walk back down to the second floor, or escape the dungeon, go back to town and regroup, then head back for a second trip. The choice is up to you... the safer alternative would obviously be to escape and head back to town and rest, but if you are in good condition and have enough Dimates left, you may want to take the walk instead just for the sake of gaining EXP and Meseta from the battles. Whichever you choose, our target is back down to the second floor.
As you know, each of the four corners of the bottom floor contains a chest. Obviously, to get to them, you"ll need to head for the respective corner on the second floor and take the chute leading down. In the north-east corner you"ll find 150 Meseta, in the north-west corner a Monomate can be found, and in the south-west and south-east corners there are boxes containing a stick of Dynamite each. Now we can blast our way into Nido Tower and rescue Teim!
Now we"re done here, so use Rolf"s handy Hinas technique to escape quickly, and head back to Arima to heal up. Now that we know where Teim is located, we can go and attempt a rescue. Nido Tower, where Teim is being held, is located further from Shure along the same path. To get there, head for Shure, then continue east and around the trees, then make south and cross the bridge. You"ll find Nido Tower to the south and west.
Before actually going through the tower, it would be a good idea to hang around just inside the entrance and fight some of the tougher monsters in here for EXP and Meseta. Chances are you still don"t have enough money to purchase a Ceramic Knife from Arima (let alone two), so now would be a good time to do so.
I recommend hanging around here and fighting monsters until you do have enough meseta to purchase two Ceramic Knives from the weapon shop. It will take a little while, but considering the high attack power of each of the knives, it"s definitely worth it. Rudo can also use them, so (as crazy as it sounds) I bought two for him as well. It"s not necessary, but since they are MUCH more powerful than either the Sonic Guns or the Shotgun, it will make your journey a lot easier. It will also take a LOT of fighting to gather that much meseta. If you have the patience, then by all means do it!
After making all your purchases, be sure to head back to Paseo to sell off your old equipment, and also stock up on a few more Dimates if you feel it"s necessary. Now, let"s go rescue Teim!
Tower of Nido Map
| My Level | Rolf L10, Rudo L9, Nei L18 |
| Items | Dimate, 180 Meseta, Trimate, Teim |
| Monsters | Waspy, Buzzer, Armorant, Spinner, Pulser, Carrier, Toader, Spitkill, Poisoner, Vortex, Locust, Leecher, Amoeba, Froggy |
If you haven"t done so already, first use a stick of Dynamite to blow up the door that is barring the entrance to the Tower. Once that is out of the way you can continue out onto the actual floor. The Nido Tower consists of three floors, though each floor is considerably larger than those at Shure, so you"ll still be taking a rather long trip.
After getting past the door, walk to the right until you hit the right-hand edge of the floor. Walk north a little ways and take the first path leading to the left. After walking a little ways more you"ll see a chute leading up. Take it up to floor two, then walk due north for a box that contains 100 Meseta. Go back down to the chute, then walk due east until you hit the wall. To the south you"ll see another chute leading up. Use it to get to the top floor, then go north until you hit the north-east corner, then west to reach a box containing a Trimate.
Once you"ve gotten the Trimate, retrace your steps back down to the bottom floor. Then walk west from the chute until you hit the wall, then north until you hit another wall. To the northeast is another chute leading up... take this one back up to the second floor. From the chute, walk down, west a few steps, then down again. Follow this path and soon you"ll reach an open area with a box containing 20 Meseta. Take it, then walk back up to the open area near the chute. Walk west along the north edge of the floor, but as you do look for a Dimate in a nook to the south. Make your way to the northwest corner of this floor, where there are two chutes... one leading up and the other leading down.
First take the one leading up to floor three, then take a few steps east, then south along the corridor to reach a box containing 60 more Meseta. Take it, then head back down the chute to the second floor once again. Now use the other chute to go back down to the first floor, and make your way to the right. Take the right-hand path leading to the south and you"ll reach another chute leading back up. Take this one back up to floor two, then follow along the corridor and take the next chute back up to floor three. Walk south along the west edge of the floor and make your way to the center of the floor, where Teim is waiting. Rolf shows her the letter, and Teim is shaken by the fact that her father turned to crime for her sake. She begs Rolf to take her to her father, but since many people have come to hate Darum (and his daughter would be an easy target!), Rolf puts a veil over her head to conceal her identity. Teim then joins your party, as an item (poor Teim! :P).
Now we"re done here, so escape and head back to town and rest. Then, when you"re ready, head for the North Tunnel to the north of Paseo. As you enter, Teim rushes up to meet her father, but as the veil is still over her head, her father doesn"t recognize her! Darum demands that Teim turn over all her money or she will be killed. Teim objects, and Darum, keeping his promise, slays her with one swing of his sword. She falls dead, realizing just how much of a criminal her father has become. As Darum realizes what he has done, he turns the weapon on himself. As both die, Rolf remarks on the chaos that has been sweeping the world as of late. Someone must stop this... but who?
Keeping this tragedy in mind, we must continue on to our target, the Bio-Systems Lab. Cross through the North Tunnel, then walk west and cross the bridge. Soon you will reach the town of Oputa.
Town of Oputa Map
| Item Shop | |
|---|---|
| Monomate | 20 |
| Dimate | 60 |
| Antidote | 10 |
| Telepipe | 130 |
| Escapipe | 70 |
| Weapon Shop | |
|---|---|
| Scalpel | 180 |
| Ceramic Bar | 1200 |
| Sword | 1200 |
| Ceramic Knife | 2800 |
| Shotgun | 820 |
| Silentshot | 920 |
| Armor Shop | |
|---|---|
| Fibergear | 430 |
| Silver Ribbon | 1200 |
| Fibercoat | 300 |
| Fibercape | 420 |
| Fibervest | 280 |
| Fibershield | 1200 |
Before anything, now that we have reached a new town, head back to Rolf"s house in Paseo and you will be greeted by your next companion, Amy, the Doctor. Obviously, being a doctor, Amy will learn the most powerful of healing techniques, and will prove to be a very valuable asset to your party. Add her to your party, then head back to Oputa and gather information. You"ll learn that the Bio-Systems Lab is nearby to the south, and that there is a piano teacher in town. First, like all companions, Amy starts off weak and ill-equipped, so you"ll want to fight monsters both to raise Amy"s levels, and gather Meseta for the new equipment in town.
I recommend buying:
- Rolf : Fibergear
- Nei : 2 Ceramic Bars, Fibervest
- Rudo : Fibergear, 2 Ceramic Knives (if you haven"t done so yet)
- Amy : Scalpel, Fibergear, Fibercape
- The piano teacher in town (named Ustvestia... don"t try to pronounce that at home:P) lives in a very isolated house in the northwest corner of town. He will teach one character the "Musik" technique which is required to play the piano (which will be necessary on two occasions in the game). He will teach the technique to you for 2000 Meseta for male characters, and 5000 Meseta for females (that sexist little...). You only need to teach this to one character, I recommend to Rolf since he will be in your party for the duration of the game. You don"t have to do this now, but it would be a good idea to do so, before you forget. Besides, you could use the EXP anyway. :P
- If you ask to hear Ustvestia play, you can choose to have him play any of the background musics in the game (call it a "sound test" option if you will).
- Amy can use the Silentshot that is sold in Oputa, but I didn"t find it to be all that useful... it Silences an enemy that is attacked by it, but it doesn"t do any outright damage. I recommend sticking to the Scalpels for Amy.
Fight outside of Oputa until Amy reaches a reasonable level (high enough at least so she won"t get killed), then you may want to travel to the Bio-Systems Lab south of Oputa to gain EXP and Meseta faster. To get there, travel south and west of Oputa, across several bridges. You"ll soon come to a structure near a tunnel. This is the Bio-Systems Lab!
Map
| My Level | Rolf L11, Rudo L10, Nei L20, Amy L7 |
| Items | Antidote x2, Star Mist, Scalpel, Dynamite, Trimate, Poisonshot, Recorder |
| Monsters | Mushroom, Blaster, Stinger, Locusta, Spitkill, Vortex, Toader, Jelly, Buzzer, Leecher, Pulser, Carrier, Insecta |
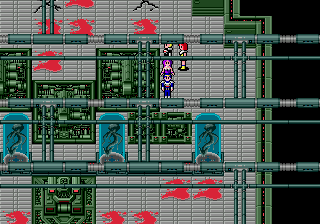 Inside the Bio-Systems Lab
In order to enter the Bio-Systems Lab, you will need to use a stick of Dynamite as you did at Nido Tower. Blast the pesky door out of the way in order to gain access to the actual lab. It consists of three floors and a basement. The basement contains the Recorder we are commissioned to obtain, but in order to reach the basement, we"ll first have to climb to the top floor of the Lab.
From the entrance, walk north and you will reach a large circular room with a chute leading up near the north, and exits to the west and east. The chute and east exit lead to dead-ends, so take the west exit from this room and follow the corridor all the way around until hit the north end of the floor. Here you"ll see another chute leading up... take it up to the second floor. Then make your way to the south (don"t fall down into the pits!), and open the box to find an Antidote. You"ll see a chute leading down here, but it just leads a dead-end back down on the first floor. Instead, walk south past the chute and follow the corridor to the west.
Once you reach the open area on the west side of the second floor, walk south to find a box containing a much-useful Star Mist in a little nook. Star Mist are extremely useful items which restore the HP of all party members. They are quite rare, so it"s best to save them for dire situations! After obtaining it, ignore the nearby chute, and instead go back north and continue your way around the west edge of the floor. Continue to follow the corridor down, around the south side of the floor, and up the east side. Along the way, you"ll find another box containing a Scalpel. Grab it, then continue your way around the corridor and you"ll end up at a chute leading down back at the north side of the floor (basically we just went in one big loop around the floor!) Take this chute down to the first floor.
Back down on the bottom floor, walk east to reach the east side of the floor, then make your way through the glass containers (just walk along the outside wall) to reach another chute leading back up in the bottom-left corner. Take this one back up to floor two, then walk north-east along the corridor to reach another chute leading up to the top floor. Take it up to the top floor, then walk a few steps west, then head south. Follow this corridor south, and around until you reach the south wing of the floor. At the end of the path you"ll find another stick of Dynamite (the last one in the game), which you will be needing shortly. Make sure you get this, then head back to the chute.
Now take the path leading to the west (in the upper-left corner, near the chute) and follow it all the way around, back down to the south wing. Eventually you"ll come to a barred door in which you will need to use your handy-dandy stick of Dynamite to blow up. However, once you enter the blocked room, the only thing you"ll find is a pit. What"s this? Well, only one way to find out... hold your nose and jump!!
Once you jump into the pit you will fall all the way down through the Lab, and land (more or less) in the center of the basement.
- The orange spots on the floor all over the basement are "damage zones". Whenever you step onto a damage zone, you"ll take one HP of damage. The game is cruel enough to stick many of these directly in your path around here, with no way to avoid them (yeech... how could people work in these conditions?). Hope you have some medicine left.
- Now that you"re in the basement, there is no way to get back up to the other floors of the Lab other than escaping using an Escapipe (or the Hinas technique). However, if you"re out of Escapipes (and Rolf is out of TP), you"re not completely screwed... there is a stairway leading up in the southwest corner of the basement which leads up to an exit to the outside on ground level. This is your "emergency exit".
Now we"re in the basement, so let"s find that recorder! Again, you start in the middle of the basement, so make your way out of the little area you start in, then head for the south part of the basement. Like the rest of the floors in the Lab (and the ones in Shure), there are four distinct "corners" to the floor. The southwest corner houses a box containing an Antidote, as well as the emergency exit I noted before. The southeast corner holds a box containing a Poisonshot, which should be equipped on Amy. The northwest corner holds yet another box containing a Trimate, and finally, the northeast corner holds a huge control panel that, when searched, reveals the Recorder... the item we have been looking for!
Once the Recorder is in your hands, exit this horrid place, then head back to town for a quick rest. Now, go back to the Central Tower in Paseo and get the Recorder to the Governor! After a quick analysis of the data, you"ll go to the library to check the results. The accident at the Lab resulted from a massive energy over-load being poured into the system all at once. As a result, the creatures being raised at the Lab evolved into the Biohazards, who then spread over the world, throwing Mota"s natural eco-system out of order.
The librarian will also show you a few graphs... after the time of the accident, the energy being consumed by the Lab sky-rocketed up to extremely high levels. Consequently, the overall temperature of Mota also sky-rocketed, and the rainfall plummeted to dangerously low levels. The energy that is supposed to be used to run Climatrol (a building which controls the climate of the planet) is now being sucked away by the Bio-Systems Lab, causing the abnormal changes in temperature. She also makes one last note that the Bio-hazards could actually be a terrorist attack by someone... in any case, it is essential to find out why the energy from Climatrol leaked to the Bio-Systems Lab. The librarian then gives you the Key Tube, which can open the door in the tunnel near the Lab. Our next mission is to investigate Climatrol!
The Search for Climatrol
After receiving the briefing for your new mission, head back to Rolf"s house and you will be greeted by Hugh, the biologist. After a quick introduction he will join your party. Hugh, probably the most over-looked character in the game, is the leading expert on plants and animals (and Bio-hazards), and thus learns many techniques that effect them in various ways, but his attacking strength is rather low. When built up to a higher level, Hugh learns many powerful techniques that will prove to be effective against bio-monsters!
Since you can only have up to four members in your party at one time, if you want to bring Hugh along you"ll have to leave someone else behind. Since Nei must always be in your party, you must choose between Rudo and Amy. Before anything, I recommend taking Hugh to the Bio-Systems Lab and building him up a few levels, that way he won"t get killed by anything and everything. You should go back to Oputa and buy a few pieces of equipment for him... a Fibergear and Fibercoat from the armor store, and if you can afford it, two Ceramic Knives from the weapon store. If you can"t afford the two knives, buy him another Scalpel.
When you"re ready to proceed, head back to the Bio-Systems Lab and enter the nearby tunnel. The Key Tube that the Librarian gave you will allow you to open the locked door. Now you can continue through the tunnel to the other side. Once on the other side, make your way to the south and east, and you"ll see yet another tunnel crossing over onto a small island in the middle of the dried-up lake. On this island, is a town... this is the resort town of Zema!
Town of Zema Map
| Item Shop | |
|---|---|
| Monomate | 20 |
| Dimate | 60 |
| Antidote | 10 |
| Telepipe | 130 |
| Escapipe | 70 |
| Weapon Shop | |
|---|---|
| Whip | 1400 |
| Ceramic Sword | 3200 |
| Slasher | 2000 |
| Laser Knife | 4400 |
| Cannon | 2200 |
| Poisonshot | 1700 |
| Armor Shop | |
|---|---|
| Titanium Gear | 1400 |
| Titanium Helmet | 3700 |
| Shoes | 240 |
| Boots | 1000 |
| Fiber Emel | 1360 |
| Mirror Shield | 4800 |
Take a quick look around town (noting all the equipment that you need to buy), then head back to Rolf"s house at Paseo to meet up with another companion... Anna, the guardian. She is a vicious fighter whose job is to track down (and destroy) evil hunters. Though she can"t use guns, she can use most bladed weapons, including whips and slashers, which are her specialty! After the introduction, it"s now time to start building up more meseta to purchase all this equipment! I recommend taking Hugh and Anna with you to build them up a bit higher, as the next dungeon will prove to be more difficult than what we"ve been through before!
The enemies around Zema are, for the most part, the same as the ones you fought in the Bio-Systems Lab. They should be good enough to gain meseta from, though once you get Hugh and Anna built up to a reasonable level, and you"re feeling brave, you may want to head to the garbage dump Roron (which, by the way, is our next target) which is southeast of Zema. There are much more powerful enemies there (that give very good exp and meseta), so if you do head that way, be careful! Be especially wary of the Slugmess enemy... they come in HUGE groups (up to five!), and are capable of splitting (i.e making clones of themselves!), and have very high HP and attack power. Rolf"s Zan technique and Hugh"s Sagen technique (as well as Anna"s slashers) come in real handy during battles with Slugmess. However, the Slugmess are THE best source of EXP and Meseta around here... 231 EXP and 218 Meseta apiece!!!
The equipment I recommend purchasing is as follows:
- Rolf : 2 Laser Knives, Titanium Helmet, Boots
- Nei : nothing
- Rudo : 2 Laser Knives, Titanium Gear
- Amy : Fiber Emel, Titanium Gear, Boots
- Hugh : 2 Laser Knives, Titanium Gear, Boots
- Anna : 2 Slashers, Titanium Gear
*NOTE* Your preference may differ from mine in a few places here. Yes, I know there are a lot of Laser Knives up there (and they aren"t exactly cheap) but they have more attack power than either the Ceramic Sword (Rolf), Cannon (Rudo), or Slashers (Anna). Also, if you want to buy another Poisonshot for Amy instead of an Emel, it"s up to you... but I figured the extra defense gained from the Emel would help her out more than another Poisonshot (as they don"t really do all that much damage anyway). Though the Laser Knives have more attack power than the Slashers, they are capable of hitting all the monsters in a particular group, giving them an advantage in battles with lots of monsters. Once again, it"s up to you.
Getting all this will probably take a while, but as I said before, this gives you a good opportunity to level your new companions. Obviously if you"re not planning on using a certain character for a while, there"s no point in buying equipment for them, but I went ahead and did it anyway, if only to use it as an excuse to gain experience. I usually try to keep all my companions at a somewhat even level (except for Rolf and Nei, who will inevitably be ahead, since you must always have them in your party), but (as is the case many times), it"s really a matter of preference. ;)
When you"ve finally purchased all the equipment you want, it"s time to head for the garbage dump, Roron. It is located on a small peninsula to the southeast of Zema. The enemies there are very tough, so I recommend stocking up on tons of Dimates... since they are rather cheap and you get good meseta around here, buy as many as you can, but leave a few inventory spaces open for treasure that you might find in Roron.
Roron Map
| My Level | Rolf L13, Nei L26, Anna L11, Hugh L10 |
| Items | Cannon, Ceramic Bar |
| Monsters | Pinchant, Locusta, Stinger, Slugmess, Squat, Hit Tail, Fang, Fire-Eye, Mushroom, Amoeba, Spinner, Spitkill, Rot Wood, Vortex, Pulser |
This dungeon can be quite a bit frustrating. As you enter, you"ll see a single chute leading down inside a small enclosed area. However, what you cannot see is that if you walk to the south around that area, there is another similar area further south where there is another chute leading down. This is easy to miss, and as you might expect, is the correct way to go. However, for the sake of getting all the treasure, first go down the chute closest to the entrance point of Roron.
Once downstairs, follow the corridor to the north for a while, and you"ll reach a box. However, upon opening it, all you"ll find is a stash of garbage (another frustrating aspect of this dungeon... most of the boxes merely contain garbage!). Continue to the right along the same corridor, and eventually you"ll reach a chute leading down. Take this chute down to Basement 2, then walk to the right to reach a box containing a Ceramic Bar. And, well, that"s pretty much all there is down here. Make your way back up to the entrance, then enter the "south wing" by walking south around the enclosed area (you"ll be walking on the black area). Take the chute here leading back down to the first basement.
Once downstairs (again), follow the corridor to the right all the way around until it branches off to the north. Ignore this, continue your way to the left, and you"ll see another branch to the north. Walk north, and soon you"ll reach a box containing a Cannon. Pick it up, then continue to the north and you"ll reach another chute... take it down to basement 2. Walk south past the garbage box, and follow along the passage until you reach yet another chute, leading down. Use this one to reach basement 3 (the bottom floor).
On the bottom floor, make your way to the south, and you"ll see a few Mota natives running around, as well as another box containing garbage. Talk to all of the Mota people, and you"ll learn that one has assembled a Jet Scooter and that he is about to test it out outside. Once you have spoken to him, exit Roron and you"ll find the Jet Scooter abandoned outside. Examine it and you"ll find a note that states the owner would rather fiddle with his garbage than the Jet Scooter, and that the person who finds it can keep it. Wow... must be our lucky day!
- Now that you have the Jet Scooter, you can explore the waters of Mota. You can get off anywhere where there is land by driving up next to the shore and pressing the A button. Also, all areas of Mota are accessible now, so it"s time to do some exploring!
- Whenever you use the Ryuka technique, or teleport to a a different town, the Jet Scooter will automatically appear at the closest body of water to the town you teleported to. This is to not make your Jet Scooter inaccessible as you teleport from town to town!
First head back to Zema to take a little break, then we should head off for the next town. Though we have the Jet Scooter, it is also accessible by land. Head southeast of Zema, and cross the bridge as if you were going to Roron. Once across the bridge, walk to the west, and you"ll come to another bridge. Cross again, then make your way south and west, and through the gap in the domes to reach yet another bridge to the north. Once across this bridge, the town of Kueri will be visible to the north!
Town of Kueri Map
| Item Shop | |
|---|---|
| Monomate | 20 |
| Dimate | 60 |
| Trimate | 160 |
| Antidote | 10 |
| Telepipe | 130 |
| Escapipe | 70 |
| Weapon Shop | |
|---|---|
| Boomerang | 480 |
| Laser Slasher | 6700 |
| Laser Bar | 3100 |
| Acidshot | 4800 |
| Silentshot | 920 |
| Laser Shot | 6200 |
| Armor Shop | |
|---|---|
| Titanium Armor | 5600 |
| Tiantium Cape | 6300 |
| Titanium Chest | 5400 |
| Knifeboots | 4200 |
| Mirror Emel | 5120 |
| Ceramic Shield | 8300 |
As has been the standard procedure when reaching a new town, take a quick look around, and cringe at the thought of purchasing the new equipment for your characters (just a bit expensive?). Then, teleport back to Paseo and visit Rolf"s house to meet your new companion... Kain, the wrecker. Though Kain isn"t very useful against bio-monsters, his profession is trashing robots. Many of his techniques are similar to Hugh"s, only Kain"s effect robots while Hugh"s effect biomonsters. Kain won"t be become really useful until later in the game when you start fighting robotic monsters.
Don"t add him to your party just yet... for now, teleport back to Kueri. There is one more town that exists on Mota, and it is only accessible via the Jet Scooter. Exit town, and head for the shoreline to the west to find your Jet Scooter conveniently waiting for you. Jump on board, then sail due west and you should hit an island with some mountains on it. Remember where this island is... you"ll be searching for something here in a little while! Sail around to the south of this island, then sail due west until you reach land. Park the scooter, then make your way across a series of bridges until you reach the final town, Piata!
Town of Piata Map
| Item Shop | |
|---|---|
| Monomate | 20 |
| Dimate | 60 |
| Trimate | 160 |
| Telepipe | 130 |
| Escapipe | 70 |
| Hidapipe | 280 |
| Weapon Shop | |
|---|---|
| Laser Sword | 5400 |
| Laser Bar | 3100 |
| Acidshot | 4800 |
| Vulcan | 12600 |
| Laser Shot | 6200 |
| Laser Cannon | 20000 |
| Armor Shop | |
|---|---|
| Silver Crown | 470 |
| Jeweled Ribbon | 4700 |
| Ceramic Armor | 11700 |
| Ceramic Cape | 12400 |
| Ceramic Chest | 10000 |
| Long Boots | 6800 |
As always, look around town, then teleport back to Paseo. At Rolf"s house, you meet your final companion, Shir the thief. Though not the most useful character, Shir is useful in the fact that she can steal items from shops! She does this at random however, and after stealing an item, she will leave your party. In order to get her back, you"ll have to head back to Rolf"s house. As she gains in strength, she will be able to steal more valuable items, including the Visiphone... the most useful item in the game which allows you to save your adventure anywhere, and even rare items such as Star Mist and Moon Dew!
Now that you have all your companions and can teleport freely from any town, it"s time to start buying equipment. Yes, there is a lot, and yes it is horridly expensive, but it will be necessary as the monsters at Uzo Island are VERY strong. First, head back to Kueri. There is a researcher in this town who is trying to develop a special gum that allows humans to breathe underwater. You"ll find his house in the south part of town... you"ll have to walk around the outside of town to reach it (why is it these professor types always live out in the middle of nowhere...?). Upon talking to him, you"ll learn that in order for him to complete his project, he needs a special leaf called the Maruera Leaf that grows on Uzo Island (remember that island with the mountains on it? The one I told you to remember?). In order to get to Climatrol, we"ll need this gum, so looks like we"ll have to help him!
Remember, Uzo Island is due west of Kueri. Walk up to the mountains and you will enter the actual dungeon area. I recommend fighting around here to gain EXP and Meseta, which you receive in quite large amounts around here, though the enemies are extremely tough. Around Piata is also a good place to build up, at least until you have enough equipment to survive at Uzo for any length of time. I also recommend leveling up Kain and Shir a bit, since (as always) they start at level one. The equipment from Piata can wait a while, so I suggest getting the following:
- Rolf : Titanium Chest
- Nei : 2 Laser Bars, Knifeboots
- Rudo : Laser Shot, Titanium Armor
- Amy : 2 Acidshots, Titanium Cape
- Hugh : Titanium Chest
- Anna : 2 Laser Slashers, Titanium Cape, Knifeboots
- Kain : Titanium Armor, 2 Laser Knives & Titanium Helmet & Boots (from Zema)
- Shir : 2 Laser Knives & Boots (from Zema), Fibercape (from Oputa)
When you"ve (finally) made all your purchases, set out for Uzo Island and start your search for the Maruera Leaf!
Uzo Island Map
| My Level | Rolf L16, Nei L32, Rudo L14, Anna L13 |
| Items | Maruera Leaf |
| Monsters | Scaly, Fanbite, Blockhed, Catman, Glowstik, Wolfang, Head Rot, Burnwolf, Terakite |
Uzo Island is a pain. The monsters are strong, the island is simply huge, and the layout is a nightmare... a maze if I ever saw one! And to make matters completely worse, there are seven Maruera trees at the top of the island, and as you would expect... only one of them contains the leaf we are looking for! Stock up on a full load of Dimates, and at least one Escapipe/Telepipe because you will most likely need them!
*NOTE* Chances are good you"re probably wondering about the Visiphone that I"ve been preaching about up until now. As a matter of fact, now would be a good time to get it. Make sure that Shir is about level 10 or so, then head back to the Central Tower at Paseo. Enter the item-storage room, then exit, and repeat until Shir makes her move. Upon going back to Rolf"s house and retrieving her, you"ll find your shiny new Visiphone in her inventory! I recommend you give it to Rolf since he"ll be in your party for the entire game. With the Visiphone, you can save your adventure wherever you please! However, note that when you use the Visiphone to save, the Ryuka technique will always take you back to Paseo.
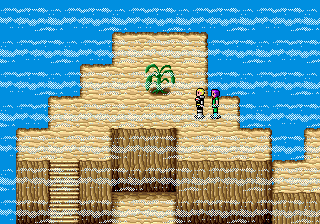
From the island"s entrance, walk to the right, and go up the stairs. Then, walk all the way to the left, up the stairs, and up the next stairs to your north. Go left, down the stairs, left a bit more, up the stairs, then all the way to the left once again, and down the stairs. Walk right, down the stairs, and follow along this path until you reach a cave entrance. Go inside and you"ll come out on a different part of the island. You"ll see a small pond nearby, with a waterfall. Go right a little ways, up the stairs, to the right, up the stairs, right again, and up the stairs. There"s another cave entrance to the left, but as it leads to a dead-end, ignore it.
Walk all the way to the right, down the stairs, then follow along this path until you reach yet another cave entrance. Go inside, and you"ll come out near the top of the island. There are Maruera trees to your left and right... the one on the left contains the Leaf we want. Search the tree, get the Maruera Leaf, and then get the heck out of here!
Scoot back to Kueri and re-visit the professor"s house now that you have the Maruera Leaf. Hand it over to him and he will quickly make the Maruera Gum, which will allow you to breathe underwater! Don"t worry about running out, as this Gum can be used over and over (hmm... ABC gum, yummy!)
Now the only thing left to do is find the underwater entrance to Climatrol. Climatrol is the biggest dungeon thus far (hosting 8 floors plus an underwater basement), and is home to the toughest bio-monsters in the game. Before you go there, I recommend buying the equipment from Piata to prepare yourself.
More equipment upgrading blues:
- Rolf : Laser Sword, Ceramic Chest
- Nei : Jeweled Ribbon
- Rudo : Laser Cannon, Ceramic Armor
- Amy : Silver Crown, Ceramic Cape
- Hugh : Ceramic Chest
- Anna : Ceramic Cape, Silver Crown
- Kain : Ceramic Armor
- Shir : Ceramic Cape, Silver Crown
Since you"ve already seen that the monsters at Uzo Island give large amounts of Meseta (and EXP), I recommend fighting there to build money for the equipment. The stuff is expensive, but your characters are strong enough by now that the monsters shouldn"t give you too much trouble, so it won"t take all that long. You"d be surprised at how much stronger the new pieces of armor are!
*NOTE* As an alternative, you may want to take Shir along with you and have her steal some items from the various shops. What Shir will steal depends on which type of shop you enter, but she will often steal items that are not even available for sale in the shops! From item shops she may steal Star Mist (which sell for 500 meseta) or Moon Dew (sells for a whopping 6000 meseta!)! From weapon shops, she will usually steal Daggers or Laser Knives, but rarely you may get other items such as Laser Shots or even Fire Staves (which are darn nice weapons for Amy!). From armor shops, Shir will steal Silver Crowns, Shune Boots, or Green Sleeves (a piece of armor only Shir can equip). However, getting any particular one of these items could take a very long time and is likely to be more boring than fighting bio-monsters.
As always, once you"ve purchased your new equipment I recommend once again stocking up on Dimates (or even better, Trimates if you care to raise enough money to buy lots of them). Chances are my levels are higher than most people"s, but I recommend that Rolf be at least level 15 before tackling Climatrol. If you aren"t yet level 15, you should build up on Uzo Island until you are... like I said before, Climatrol is the biggest and toughest dungeon yet!
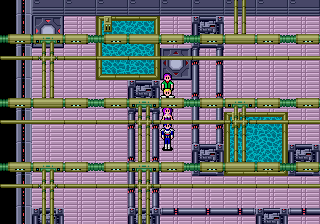
Entrance to Climatrol
The underwater entrance to Climatrol is located in the ocean south of Uzo Island. On the Jet Scooter, head west from Kueri until you hit the island, then position yourself on the west edge of the shoreline, then head due south. Soon you will reach a discolored spot in the ocean. This is the entrance to Climatrol. Sail up to the suspicious spot and use your Maruera Gum. The party will dive underwater and you"ll be in the underwater basement. Here we go!
Climatrol Map
| My Level | Rolf L17, Nei L34, Rudo L15, Anna L14 |
| Items | Jeweled Ribbon, Fibervest, Silver Ribbon, Knifeboots, Laser Bar, Ceramic Bar, Sandals |
| Monsters | Fang, Pug Brat, Pug Kill, Slugmess, Rot Wood, Scaly, Burnwolf, Fanbite, Blastoid, Catman, Glowstik, Spitkill, Spitfang, Head Rot, Firia, Python, Whirly, Blockhed, Catfang, Cateye, Forest, Flarewlf |
| Boss | Neifirst |
The underwater basement area contains many of those annoying damage zones that existed in the basement of the Bio-Systems Lab. Careful where you walk.
From the entrance, move to the west along the corridor until it branches off to the south. Take this branch to the south, cross the damage zones (ouch), and follow along the path some more. When you reach a large open area with more damage zones, move to the northwest, and soon you"ll reach another large open area. Take the corridor leading off to the north, and follow this until you reach yet another area with more damage zones. Walk to the left, past a big clump of damage zones, until you see a path leading off to the south. Take this path, cross the myriad of damage zones in this area, and make your way to the southwest corner, where there are stairs leading up to the first floor of Climatrol itself!
The first floor consists of some narrow passages, and is quite simple. From the chute, just walk south until you hit the wall, then walk all the way west until you hit the wall. Go south to the wall, then west until you reach the chute leading up to floor two. The second floor is just one small square-shaped room... walk to the east and use the chute to get up to floor three. Floor three is similar, but with a large pit in the middle. Head for the south side of the room to find a box containing a Jeweled Ribbon, then head for the north side and use the chute to go up to floor 4. On floor 4, make your way to the south side of the room, grab the box containing a Fibervest, then ascend the chute to floor 5. Here"s where things get hairy. The top four floors are large, and contain countless chutes leading every which way. On top of that, these floors contain the toughest bio-monsters in the game.
On floor 5, you"ll find yourself in the direct center of the floor. Like many of the other dungeons, there are four distinct "corners" to the floor, and each "corner" contains two chutes leading up. Getting each of the treasures will be difficult since they"re scattered all over the place, so I"ll divide the run up into three distinct "trips", each trip will end you back up at the center of the fifth floor.
Trip 1: From the center of floor 5, head northeast and take the chute leading up in the far northeast corner up to floor 6. Walk south, and continue up the next chute to floor 7. Walk south from here and you"ll find a box containing some Sandals. Pick them up, then continue down and to the right. You"ll see a chute leading up to floor 8... ignore it, continue right, and down the chute on the far right, back down to floor 6. Walking south, you"ll see two more chutes, one leading up, the other leading down. Ignore both of these, and follow the corridor until you reach yet another chute leading up near the pit. Take this up to floor 7, then follow the path and take the chute at the end up to floor 8. Walk west along this corridor, and once you reach an open area, go southwest to reach another chute leading down. Go back down to floor 7, and walk right, then south to find a box containing a Laser Bar. Grab it, head back to the chute you came from, then walk west to find a chute leading back down. Take it down to floor 6, and walk south along the edge of the pit. Ignore the next chute leading up, and continue around the outside of the pit until you reach a box containing some Knifeboots. It will seem like the path stops at a wall, but there is an itty-bitty walk-able piece of land just between the wall and the pit (it"s so small the wall conceals it). Use this to get over to the seemingly un-accessible chest. Grab the treasure inside, then go back and take the chute you passed to go back up to floor 7. You"ll be in a small isolated room here, so just walk south and take the next chute down to floor 6. Walk to the southeast and take the chute at the end of the passage back down to floor 5, and make your way back to the center. Trip 1 complete!
*NOTE* If you need, you can exit Climatrol and come back here after a quick rest. If you feel you"re in good enough condition to continue... well, continue!
Trip 2: We"ve already got the majority of the treasures, so this one will be short. Head for the southwest area of floor 5, and take the chute in the far southwest corner. Move east to a large open area, and you"ll see a chute leading up and one leading down in the vicinity. Take the one leading up, then follow the corridor to the west to reach a box containing a Ceramic Bar. Go back east, down the chute, and down the other nearby chute leading down. You"ll end up back down on floor 5. Now head back to the center. Trip 2 complete!
- This will be the final trip. The top floor contains a boss monster, the first one you"ve fought so far. As you would expect, it is tough , so I recommend going back to town and taking a rest, whether you think you need it or not. I also recommend stocking up on some Trimates (your runs through here most likely are filling up your pockets quite nicely!), and if you haven"t gotten the Visiphone yet, I strongly recommend you do so now. Once you"re ready and rested, head back to the center of floor 5. Here we go!!
- Try to conserve Rolf"s TP as you make your way to the boss. Provided you have enough Trimates, you shouldn"t have to use either his healing techs or his fighting techs unless you"re really in trouble. Trust me... you"ll need Rolf"s TP for the boss fight.
Trip 3: Head for the northwest area of the floor, and take the chute that is situated near about the middle of the north wall (i.e not the one in the far northwest corner). Take this up to floor 6, and take the next chute that"s about two steps away to continue up to floor 7. Walk south through the open area, and take the narrow corridor leading east. When it branches to the south, head south and you"ll reach a chute leading down. Take this back down to floor 6, then head west to find a box containing a Silver Ribbon. Grab this, head back east to the chute, then walk south along the outside of the pit to reach yet another chute leading back up to floor 7. Take it, then walk straight west to reach a chute leading up to floor 8. Ride it up to the top floor, then walk east to a semi- open area. You"ll see several narrow passages leading to the right... five of them to be exact. Most lead to dead-ends, but one (the one in the center), leads to the boss monster. Wait a minute... doesn"t that look like Nei??
- Before talking to the boss monster, use the Visiphone and save your game! As I said before, the boss is tough, and you don"t want to have to march all the way through Climatrol again!
- Nei must be alive for this part. If Nei is dead, you might as well exit Climatrol now and go bring her back to life.
Upon talking to the mysterious Nei-lookalike, you"ll learn that her name is Neifirst (?), and that, Like Nei, she is a product of combined human cells with those of a bio-hazard. Since the scientists at the Bio-Systems lab deemed the project a failure, they tried to kill her, but failed. Neifirst escaped, stealing DNA from the Bio-Systems Lab that allowed her to create the bio-monsters as revenge for conducting their experiments! The bio-hazards all over Mota were caused by Neifirst!
However, she also explains that there is "another" Nei inside her, one that is trying to stop her. This, of course, is the Nei that we all know so well. But Nei protests that she, unlike Neifirst, isn"t a monster that despises all people, and attacks her!
Boss Battle: Neifirst
| Hit Points | 1,100 |
| Attack Power | 178 |
| Defense Power | 10 |
| Experience | 1,111 |
| Meseta | 1,111 |
| Special | Attacks all allies |
First, you"ll be fighting Neifirst with Nei alone. No matter how powerful Nei might be, Neifirst is probably way too powerful for Nei to overtake by herself. Though in theory it is possible to kill her, chances are it"s not gonna happen. After fighting valiantly, Nei is soon over-powered and slain by Neifirst. Rolf and party fly into a rage and attack Neifirst. Now comes the real battle!
Now you"ll be fighting with only three members, excluding Nei who has tragically been slain. As you"ll see, Neifirst"s attack power is extremely high, and her special attack will hit all members of your party. Rolf should repeatedly throw out the Nafoi technique, while your other party members should attack with their weapons. If someone starts running low on HP (which is quite likely), have the weakest member (i.e the one that does the least damage to Neifirst) use a Trimate on him/her. Neifirst has 1,100 HP (quite a lot, no?), and she is fully restored before the battle so any damage Nei may have done to her is nullified. Neifirst is tough, but not impossible.
*NOTE* If by some small miracle you manage to defeat Neifirst with Nei alone (be it by cheating or whatever:P), Nei will still die, as since she is a part of Neifirst, when Neifirst perishes she will as well. If Nei is at a really high level and you give her a full load of Trimates it might be possible, but it sure won"t be easy.
Either way, after the battle, all the energy that was being controlled by Neifirst begins to pour into the system at once! Climatrol will begin to explode, and all the rain supply stored by Climatrol will begin to flow into the central lake. Now, instead of being completely dried up, there is so much water that Motavia is in danger of flooding! Rolf safely transports the party back to the capital of Paseo. You"ll automatically head to the Clone Lab, but as stated before, since Neifirst and Nei are of the same origin, the death of Neifirst in turn destroyed Nei as well, and she cannot be returned. She also mentions a plateau near Paseo where you can put her to rest. Afterwards Rolf heads back to the Central Tower.
On your way up to meet the governor, a frantic townsperson explains the situation... that the lake has overflowed and Mota is in danger of flooding! The only way to save Mota is to open the four dams that regulate the water supply in the lake. If the dams are opened, the excess water supply will be carried out safely to the ocean. Rolf volunteers for the job, but the governor explains that the government of Palma (the first planet of the Algo system) has labeled Rolf and party the cause for the malfunction in Mother Brain, and has sent an army of robots out onto Mota to exterminate you! Still, Rolf insists on taking the job, so the governor reluctantly decides to assign Rolf with the task of opening the four dams. The cards are hidden in a secret control tower, the location of which is unknown. There are four keycards, one for each dam. The cards allow you to both enter the dam, and activate the control panel inside which opens the floodgates. Now, once again we have our work cut out for us... we must find the keycards, and open the dams before Mota floods!
- Nei is now gone from your party, permanently. Any items that she was carrying (including equipment) are also gone. If Nei was carrying the Visiphone... well, hmm, heheh... you"re screwed.
- Now that Neifirst is dead, the bio-monsters are gone from Mota, permanently. However there is a new threat to Rolf and his friends... the robots that have been sent out by the government of Palma! You will be fighting the security robots instead of the bio-monsters from this point forward. Thus, Hugh loses most of his usefulness at this point, while Kain gains his usefulness. Also, you"ll obviously have three party slots available now, since Nei is no longer among us.
Opening the Dams, Part One
The "secret" control tower where the keycards are located is situated in the town of Piata. Teleport back there, then head for the northwest corner of town. You"ll see a bridge that leads over to a tiled area kinda shaped like a +, but there"s nothing over there. Walk south along the edge of town, and when you"re about even with the hospital, head due west. You"ll come to a ruined area of town with a few destroyed houses and three towers. The control tower in the middle is the one that houses the keycards we are looking for!
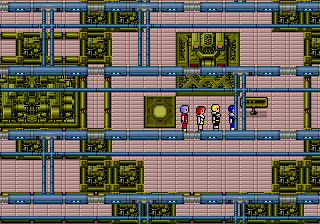
Control Tower Map
| My Level | Rolf L18, Rudo L15, Anna L15, Kain L14 |
| Items | Red Card, Yellow Card, Blue Card, Green Card |
| Monsters | Mazgamma, Wireface, Metalman, Informer, Eyesore |
*NOTE* Before doing anything, make sure that one the characters you are bringing along has the Musik technique (if you forgot, you can learn from Ustvestia, the piano teacher, in Oputa). You"ll need it to gain access to the keycards!
The Control Tower has only two floors, but if you thought Climatrol was bad for having chutes all over the place, you haven"t seen anything yet. The first floor has no less than 69 chutes leading up to the next floor (No, I"m not kidding. There really are 69 chutes. Stop laughing.). If you know where you"re going the dungeon is fairly short, and if you don"t it will probably take forever. Of course, the same thing could be said for almost every dungeon, but...
Upon entering the Control Tower, make your way north, around the large structure in the center of the floor. Once you are on the north side of the floor, there will be a corridor leading to the left and right. Walk to the left, passing by chute after chute along the way. Once you reach the left end of the corridor, go back right counting off the chutes, and take the 4th chute from the left up to floor 2. Walk south, past a few more chutes, until you reach the south end of the corridor. You"ll find yourself in a wide open area, with one lone chute leading down on the left-hand side. Take this one down, then take a few steps south and take another chute back up to floor 2. Make your way to the right, going upstairs/downstairs repeatedly until you reach an area on the second floor where there are four chutes in a row leading down. Take the third one, then walk north and take the chute at the end of the passage back up to floor 2. Now you should be in the center of the floor.
Walk to the right, cross the pit, and walk up to the piano. Here"s where you"ll need to use the Musik technique! Use Musik in front of the piano to play it, and the door behind the structure containing the piano will open.
*NOTE* If you examine the piano, your party will remark on the piano and sheet music. However, don"t touch the piano! By doing so you"ll be teleported back outside the Tower, and you don"t want to have to go through here again.
Go back there past where the door was, and you"ll find four consoles. Search each of these to obtain the four keycards to the dams! Now that we have these, we can now begin our quest to open the four dams and save Mota!
Techincally, you can tackle the dams in any order you please, but the recommended order is "Red, Yellow, Blue, Green" as both the monsters you fight and the complexity of each dam increases in that order. In other words, the Yellow Dam is tougher than the Red Dam, Blue is tougher than Yellow, and Green is toughest. Our first target is Red Dam, which although is the least difficult of the dams, it is the most difficult to get to (though neither of the four dams are exceedingly difficult to reach).
As you"ve probably seen throughout your "hikes" throughout Mota, each dam is located near the Central Lake. There is one on each side of the Lake (north, east, south, west) and they are only accessible via the Jet Scooter. The Red Dam is located on the south side of the Central Lake. To get there, teleport to Zema and southeast to the peninsula where Roron is. Board the Jet Scooter.. the wide canal that leads to the Red Dam should be right nearby.
Red Dam Map
| My Level | Rolf L18, Rudo L16, Anna L16, Kain L15 |
| Items | Sword of Anger, Fire Slasher, Fire Staff |
| Monsters | Mazgamma, Eyesore, Poleziax, Wireface, Sonomech, Metalman, Informer, Wirehead |
The Red Dam is the least complex of the four, and consists of three floors... two ground floors and a basement. Upon entering the Red Dam, use the Red Card to open the door. The path through the dam is actually rather straight-forward, as there aren"t really that many dead-ends (or zillions of chutes leading every which way:P). After passing through the door, head for the north-west corner of the floor and descend the chute down to the basement.
Once downstairs, follow the corridor until you reach a rather large open area, and about in the middle there will be a chute leading back up. Ride back up to the ground floor, then walk south. Here there will be a passage leading off to the west, and a chute in the southeast corner, leading up. Take the chute up to the second floor, and you"ll find yourself in an enclosed area with a box. Open it up to obtain a Fire Slasher... a rather nice weapon for Anna! Go back down the chute and follow that passage leading off to the left, and take the chute in the south-west corner back down to the basement.
Back downstairs again, head to the north and east, and you"ll reach another open area, with a chute leading up (once again) about in the center. Ride it back up to ground floor, then head west and use the chute in the north-west corner to travel up to floor two. Now follow the passage around the large pit, and make your way to the right-hand side of the floor. When you come to another group of pits, you"ll see the console that controls the opening of the dam to the south across the pit, but we can"t get to it from here. Once you pass the pit "group", head to the south and pick up a box in a nearby nook to obtain a Fire Staff, which is a rather good weapon for Amy. Note that the Fire Staff also throws out a FOI technique if you use it in battle! Grab it, then go back up and continue making your way to the right-hand side of the floor.
After walking around another large pit, you should (finally) come to a chute leading down. Ride back down to ground level, then head south and use the chute in the south-east corner to head back down to the basement. From the chute you just came from, head to the north and west, and you"ll come to one last box... containing the Sword of Ango for Rolf (which is a nice weapon, might I add:). Pick it up, then head back down and take the passage leading to the left, and follow it around until you reach a chute in the north-east corner. Ride it back up to ground level (up down up down... getting tired yet?), then continue along the corridor until you reach one last chute leading back up to floor 2. Take this chute up to the top floor, then head left to (finally) reach the dam-opening console! Use the Red Card on the console and the Red Dam will open. That"s one down... three to go! Exit the Red Dam and head back to town for a well-deserved rest.
Our next stop... the Yellow Dam!
Opening the Dams, Part Two
The Yellow Dam is located on the western side of the Central Lake. The easiest way to get there is to teleport back to Kueri, and head for the nearby shoreline and jump on your handy-dandy Jet Scooter. From there, sail a short ways north and you"ll see the canal leading to the Yellow Dam. Here we go!
Yellow Dam Map
| My Level | Rolf L19, Rudo L16, Anna L16, Kain L15 |
| Items | Escapipe, Crystal Cape, Crystal Chest, Crystanish, Amber Robe |
| Monsters | Sonomech, Wirehead, Eyesore, Firgamma, Informer, Metalman, Poleziax, Twig Man, Mazgamma, Cooley61, Wireface |
The Yellow Dam is a bit more complicated than the Red Dam, with four rather large floors. First of all, as you did in the Red Dam, use your Yellow Card to open the entrance gate, then head out into the huge open area that is the first floor. As you head out, you"ll pass by two chutes, both leading up. Ignore both of these, as each lead to dead-ends. Instead, make your way to the far right wall of the floor, and (as there were on the left side) there will be two more chutes (both leading up, of course). First take the top one up to floor two.
Once upstairs, head to the left along the passage, until you reach a branch where the corridor goes left and right. Head to the left and you"ll pass by a chute... ignore this one and continue along the corridor until you reach a dead-end, where there is another chute leading up. Take this one up, and open the box in the enclosed area you come out in to obtain a Crystanish.. a nice suit of armor for Rudo to equip. Once you"ve gotten this, retrace your steps all the way back down to the first floor. Take the other (bottom) chute back up to floor two, then head south to find a box containing an Escapipe. Pick it up, then from the box walk left until you reach an open area. Go north, and at the end of the short dead-end corridor you"ll find another chute leading back down... take it back down to the ground floor.
You"ll now find yourself in the enclosed area in the middle of the bottom floor. Head due west and you"ll hit another chute. Take it back up to floor two, then head west and north until you hit another chute leading further up. Take it up to floor three, then walk south, and continue up the next chute up to the top floor. The top floor is a bit strange as it consists of three "spiral" structures. After going up the chute you"ll find yourself in the middle of one of these spirals. Make your way out of the spiral, and at the "exit", you"ll see a chute to the south. Ignore it for a second, then walk due north of this chute, and make right to find a dead-end where you"ll find a chest containing an Amber Robe. This robe, only equippable by Hugh, isn"t exactly a good piece of armor, but it throws out a "Res" technique on the person who uses it in battle!
After opening the box, head back down to the chute I mentioned before, and take it down to floor 3. Grab the box in the enclosed area you end up in to obtain a Crystal Cape, a better Cape for Amy, Anna, or Shir. Equip it, head back upstairs once more, then walk to the right. Soon you"ll reach another chute leading down. Take this one down and, like before, open the chest in the enclosed area to find a Crystal Chest... better armor for Rolf or Hugh! Head back upstairs one last time, then continue right until you hit the right-hand side of the floor. You"ll pass another chute leading down along the way, but ignore it. Once you hit the south-east corner, walk up the right-side of the floor and you"ll see the "entrance" to another spiral structure. Ignore this, and make your way up the northeast corner. Once there, walk west along the north edge of the floor (no, we"re not going in circles:P), until you see a path leading south. This is the "entrance" to the middle spiral structure.
Make your way around the spiral until you reach the chute in the middle. Descend back down to floor three and you"ll find yourself right at the dam-opening console! How convenient! Place your Yellow Card in the console and the dam will open. Two more dams left!
Make your usual run back to town and rest, plus stock up on some more Trimates if necessary. Our next target is the Blue Dam, located on the east side of the Central Lake. The easiest way to get there is to teleport to Kueri, jump in your Jet Scooter, and sail north until you are even with the canal leading to the Yellow Dam. From there, sail due west until you hit the east side of Mota, and right into the canal leading to the Blue Dam! =D
Blue Dam Map
| My Level | Rolf L20, Rudo L17, Anna L17, Kain L16 |
| Items | Antidote, Crescegear, Star Mist, Snow Crown, Wind Scarf, Trimate, Colorscarf, Storm Gear |
| Monsters | Sonomech, Wirehead, Poleziax, Wireface, Cooley61, Informer, Firgamma, Attmech, Eyesore, Twig Man, Van, Pod Head, Mazgamma |
The Blue Dam consists of five reasonably large floors, and the monsters here are tougher than those you"ve faced previously. As always, having a bunch of Trimates and an Escapipe/Telepipe handy just may save your life if the going gets too rough!
Upon entering the Blue Dam, unlock the door with your Blue Cardkey, then proceed into the actual dam. After doing so, you"ll find yourself in a quite large and open room. Make your way to the south, around the outside of the entrance room, and you"ll come to a chute in the south-east corner. Take it up to floor 2, and grab the Antidote in the treasure box upstairs. Now go back downstairs, and go north-west through the very large and open room, until you reach the north-west corner where there is another chute leading back up. Ride this one back up to floor 2, then walk south until you hit the wall, then east until you reach another chute.
Ride up to floor 3, then walk west and follow this path until you reach the north-west corner of this fairly large area. There will be a chute leading up and a chute leading down in the vicinity (the down chute is in the far north-east corner while up chute is slightly to the south-west). Take the down chute to go back down to floor 2, then walk south-west through another large room to reach a box containing a Crescegear, a very useful helmet! Even though it isn"t any stronger than the Titanigear, be sure to hold onto as it throws out a GIRES technique on whoever uses it in battle!
Go back upstairs, then go up the other chute to floor 4. Walk to the east a short ways, continue up to floor 5 (the top floor), then move to the south and east, until you reach a chute leading back down, as well as a treasure box containing a Storm Gear. This helmet is only equippable by Kain, and isn"t any stronger than the Titanimet, but it throws out a GIZAN technique (which effects ALL enemies rather than just an enemy "group") when used in battle. I recommend giving this to Kain, and have him use the Storm Gear as an item in battle in lieu of attacking.
Take the chute leading down, back down to floor 4, and walk to the right. You"ll notice 5 pits in a checker-board fashion, a treasure box, and a chute leading back up. The treasure box contains a Colorscarf, some head equipment for Anna. Not only is it more powerful than the Silver Crown... it also throws out a SANER technique when used in battle. The chute leading up leads to a dead-end, so it"s apparent the correct path is down one of the pits. The two on the right and the one in the center lead to the same place, so fall down either one of those pits, and you"ll end up back down on floor 3, directly in front of a treasure box. Open it up to obtain a Snow Crown. It is only equippable by Amy, but it also is more stronger than the Silver Crown, and even throws out a DEBAN technique when used in battle!
Grab the treasure, then move south, and down the next chute... back down to floor 2. Walk to the left, through this next large room, and take the next chute leading down, back down to the ground floor. Now, move to the north, and through the narrow passage connecting this room with the rest of the floor. Once through that narrow passage, make your way left and south, towards the south-west corner of the floor. Upon reaching the south-west area of the floor, look to the east for another chute leading back up to floor 2. Go back upstairs, then take the chute directly to your north-east up to floor 3 for a box containing a Wind Scarf. This scarf is equippable by Shir, and throws out a ZAN technique (effecting ALL enemies) when used in battle.
Now, go back down to floor 2, and make your to the far north-west corner of this floor to find another chute leading back up. Go back up to floor 3, then walk all the way to the north-west corner of the floor once again, and continue up to floor 4. Now go south and follow the path, and you"ll pass by the north edge of a square pit, with the dam opening console directly in the center. You can"t get to it from here, so ignore it for the time being. Continue to the right, and ride the chute back down to floor 3. Then, move to the south and west, go back up to floor 4 again , and you"ll see the console once again to the northwest. You still can"t get to it, so ignore it once again.
Head to the south-west to pick up a box containing a Trimate, then go back east and up to the north-east corner, and take the chute leading back up to floor 5. Back on the top floor, follow the path until you reach another chute leading back down, descend to floor 4, and there will be a down chute directly to your south, and an up chute to the south and west. First take the down chute to reach a box on floor 3 containing a very useful Star Mist! Then go back up, and take the up-chute in the south-west corner to travel back up to floor 5... again.
Move to the north-east, through the large room, until you come to two strangely-shaped pits near the north-east corner. Fall down into either of the pits and you"ll land right near the dam-opening console! Use the Blue Card to unlock the console and open the dam. Three dams are open... there"s only one more to go!
The Great Collapse
Head back to town and rest up from that taxing trip, and be sure to re-stock up on Trimates, because the final dam will prove to be the most difficult task yet!
The Green Dam is located on the north side of the Central Lake, visible from Paseo. The easiest way to get there is to teleport back to Paseo, then walk north, across the bridge, until you reach the seashore. Jump on your Jet Scooter and the Canal leading to the Green Dam will be just to your left. Here we go!
Green Dam Map
| My Level | |
| Items | Telepipe, Star Mist, Aegis, Truth Sleeves, Gr Sleeves |
| Monsters | Kilgamma, Poleziax, Cooley61, Twigtall, Attmech, Pod Head, Informer, Van, Firgamma, Monster, Twig Man, Wirehead, Hvysolid |
Although the Green Dam only consists of two floors, it is still the most complex of the four dams, as the floors are very large, and, in the tradition of Climatrol and the Control Tower, has zillions of chutes all over the place. While the previous three dams were reasonably straight-forward, this one can really make you groan. Make sure you have a stash of Trimates handy... not only is the layout confusing, the monsters are quite strong!
First, as always, use your Green Card to unlock the door and gain entrance to the Dam. Just past the door is a chute leading up into the nightmare that is the actual dam. Ride it up to floor 2, then walk a few steps north, and then west until you see a chute up against the western wall. Ride this one back down to floor 1, then go west and up the next chute. Take the Truth Sleeves in the nearby box (Truth Sleeves are a shield-type weapon that only Shir can equip, and they also throw out a RES technique when used in battle). After looting the box, walk to your north-west, and you"ll come to a room with two more chutes... one to your north and one to your south. Take the northern one back down to floor 1, head west a short ways, and ride the next chute back up once again. Walk a little ways to the left, and you"ll see a narrow walkway leading off to the north which curls around the outside of the Dam area. Ignore this for now, but remember its location. Instead, make your way to the far south-west corner of the floor, and take the nearby chute back down to the bottom floor. Now head north and east, and around the mini-spiral to the chest in the middle, which contains a Telepipe. Grab it, then go back to the walkway I mentioned before (you DID remember its location, didn"t you...? :P)
Walk along the walkway to the east, on the outside of the north wall of the Dam (just don"t step onto the black area or else you will be dumped back outside!). Once on the far right side, you"ll be able to get back into the Dam area, and just near the exit there"s another chute leading down. Ride it down to the ground floor, and make your way to the far south-east corner where there is a box containing the Aegis... a quite powerful shield! Since Rolf and Rudo probably have their hands full with their weapons, you may want to give it to Kain (and since Kain is better off attacking with the Storm Gear, it will probably do him some good anyway.) Even though the Aegis isn"t as strong as the Ceramic Shield, it"s better than nothing.. and plus it throws out a GIRES technique when used!
Grab the chest, then make your way back to the chute you came down, and ride it back upstairs. Go left until you hit the wall, then south until you hit the southern edge of the Dam. You"ll see two chutes in close proximity in this area... ignore both for just a minute. From these chutes, walk east to the wall, and then north, and you"ll reach a box containing some Gr(een) Sleeves. Like the Truth Sleeves, the Gr Sleeves are a shield-type weapon, equippable only by Amy, Anna, Shir. The Gr Sleeves are much more powerful than any other shield-type weapon so far, and also fires off a SHINB technique when used.
Now head back to the pair of chutes I mentioned before. First take the one on the right down to floor 1, and make your way to the north to find a box containing an ever-useful Star Mist. Take it, then go back upstairs the way you came, and ride the other chute back down. Walk a little ways to the left, and ride the next chute back up to floor 2. Now, from here it"s just a short walk to the dam-opening console! Before opening the final dam, heal your party members up fully... you"ll see why shortly. Use the Green Card to unlock the Dam and it will open! However, no sooner than Rolf unlocks the Dam... the party is attacked by a group of sentry Robots!!
Boss Battle: Army Eye (x3)
| Hit Points | 3,000 (each) |
| Attack Power | 35 |
| Defense Power | 104 |
| Experience | 2 |
| Meseta | 0 |
| Special | Trap party with Plasma Rings |
*NOTE* The Army Eyes will appear after the fourth dam is unlocked. This doesn"t necessarily have to be the Green Dam, but I"m assuming that most people will do the dams in the "proper" order. :P
First of all, know that the Army Eyes cannot be defeated. During the third round of combat, one of them will trap the party with Plasma Rings, and you"ll be shipped off to the Gaira satellite. However, if you manage to get killed by them, it"s still "Game Over", I"m afraid. Put up a fight if you wish, but there"s no way you can destroy all three before the third round.
*NOTE* If you"re a cheater and defeat all three, you"ll get 2 lousy experience points, and won"t be sent to Gaira, but know that you won"t be able to complete the game! If they are defeated you can"t get to Gaira, and thus the story cannot advance. Your only choice is to re-load your saved game, and go back and fight them "the right way" the next time. If you saved after you killed them... my best advice would be to go outside, get the biggest stick you can find, and beat yourself over the head with it. Unless you saved in a different slot earlier, you have no choice but to start over.
Gaira Satellite Map
| My Level | Rolf L21, Rudo L18, Anna L18, Kain L17 |
| Items | none |
| Monsters | Tracer, Poleziss |
After the battle with the Army Eyes, Rolf and party are taken prisoner and delivered to the space satellite Gaira. All your items and equipment have been confiscated, leaving you with only Prison Clothes and the Plasma Rings that bind you. The Plasma Rings are meant to keep prisoners from escaping, and while binded you cannot fight, use items, or techniques. The only to evade your enemies is to run away. Gaira is also littered with damage zones to help prevent prisoners from escaping, but as it is still unclear who is trying to manipulate Mother Brain, Rolf decides that it would be best to attempt to escape anyway.
Gaira isn"t overly large, but there isn"t any way to defeat the enemies that inhabit it. Fortunately they are rather weak, but just standing there and letting them kill you isn"t going to do a bit of good at all. Therefore, run from any encounters you face... it"s the only way to survive!
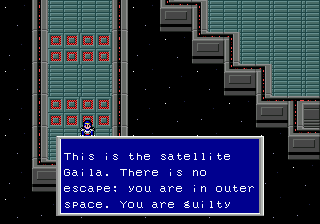
Continue along the path to the south and east, and when you reach a north/south junction, go north. Follow along the path a little bit more and you"ll soon reach the Control Panel. After checking it, it becomes apparent the Gaila is head straight for the planet of Parma!! Before Rolf can do anything, another explosion is heard and everything goes dark....
After another dream sequence similar to the one in the introduction, Rolf awakens aboard the ship belonging to a space pirate named Tyler. He happened to be nearby and rescued the party just after the last explosion. Rolf and party are OK, but the planet of Parma was completely destroyed in the collision. Tyler informs the party that someone on the planet Dezo has mysterious powers to do things that the Mother Brain cannot, and that in order to solve the mystery of the Mother Brain, it would be a good idea for Rolf and party to visit him. Tyler drops the party back off at Paseo, and Rolf quickly heads to the Central Tower.
The Governor states that only one functional spaceship remains, located on the roof of the Central Tower, and that Rolf can use it to fly to Dezo. However, since Rolf and party are still the prime suspects for the corruption of Mother Brain, the robots are still out full force, and some even occupy Dezo. At any rate, make any preparations you may need, then when you"re ready head to the roof of Central Tower and fly to Dezolis!
*NOTE* Since the monsters on Dezo shift back to bio-monsters more than robots, I traded Kain for Amy at this point. Amy"s healing spells will prove to be a lot more of an asset than Kain"s attacks, considering on Dezo bio-monsters outnumber the Robots. I also recommend trading off the Storm Gear to Amy so she can use it in battle... chances are likely it will be more powerful than her normal attack.
Exploring Dezolis
The spaceship will land at the Skure space station, situated in the center of Dezolis. Each time you fly to Dezolis, you"ll have to make your way through Skure, so it"s a good idea to make yourself familiar with it. There are four exits from Skure, each leading to different areas of Dezo. In this section, I"ll run you around Dezo, visiting each town and getting familiar with the Space Station. ;)
Skure Map
| My Level | Rolf L21, Rudo L18, Anna L18, Amy L17 |
| Items | Magic Cap x2, Mogic Cap, 73,400 Meseta, Laconchest, Gardaboots |
| Monsters | Dezo Owl, Trcrbase, Monster, Wirehead, Orangah, Orangoo, Gun Bust, Twigtall, Rabbit, Rabbita, Lrgminer, Skytiara |
*NOTE* In addition to the robots hanging around, Dezolis has its own assortment of bio-hazards. Therefore, Hugh will re-gain usefulness once again. Amy will also become a bit more useful after purchasing some of the new equipment on Dezo. I can"t really recommend taking Shir to Dezo however, as if she goes on a stealing kick after you enter a shop, she"ll take her little walk on the wind all the way back to Paseo, which means you"re either stuck with three party members, or you have to go ALL the way back to Paseo, retrieve her, and go ALL the way back through Skure once again. If you must bring her along, at least wait until all your shopping is done.
This first section is a tour of Skure (hey that rhymed... I think), which basically runs you around to each of the three towns of Dezo, each time starting from the center of Skure (where the spaceship drops you off). You can do these in any order you wish, but note that the Dezolians speak a different language that Rolf and friends cannot understand, and in order to do so, you"ll need to find a "Mogic Cap". This can be found in one of the chests in Skure, and unless one of your party members is wearing it, you will be unable to communicate with ANY Dezolians. Of course this means you won"t be able to rest, buy items, etc.
*NOTE* Once again, each of these "trips" starts from the center of Skure.
Trip #1: Aukba
Take the corridor to the north and follow it until you reach an east/west split. Go west, and down the chute that you come to. Walk west a short ways, and the path will split off at a 4-way intersection. Go north for a chest containing a Magic Cap, then go back, and go south and down the next chute. Walk north into a room with a mother-lode of six treasure chests! Only three of them contain items... they are another Magic Cap, the Mogic Cap and 5,600 Meseta.
*NOTE* As I said before, wearing a "Mogic Cap" is the only way to communicate with the people of Dezo, and only Rolf can equip it. The Magic Cap also allows you to speak with the cats that are wandering around in Skure, but they will usually be "hostile" towards you. There are also fake Caps called "Magic Caps" floating around. Though they have the same effect as the Mogic Cap, while wearing the Magic Cap the cats will give you information rather than being "hostile", but all services in Dezo will cost twice as much (this means resting, teleporting, items, equipment... everything), and all the Dezolians will tell you lies. The only thing it"s good for is talking to the animals.
After collecting the treasure, take the east corridor out from this room, and then take the first branch off to the south to reach another chest containing a Laconchest... a quite powerful suit of armor for Rolf or Hugh. Get this, then go back the you came until you reach the four-way intersection once more. This time walk left, and ignore the chute to the south for just a second. Ride the chute on your left downstairs, and take the chest at the end of the dead-end path to obtain 7,800 Meseta! Now go back upstairs and take the other chute (the one I told you to ignore just a minute ago).
Follow the long narrow corridor until you reach another chute leading back upstairs. Take this one up, and walk left. The path leading off to the south leads to a box containing 8,600 Meseta... be sure to get it! Continue left and up the chute, and you"ll find yourself now on the surface of Dezo. You"ll find the town of Aukba a short ways to the northeast of the exit to Skure!
Town of Aukba Map
| Item Shop | |
|---|---|
| Monomate | 20 |
| Telepipe | 130 |
| Weapon Shop | |
|---|---|
| Ceramic Sword | 3200 |
| Laser Knife | 4400 |
| Laconia Mace | 16800 |
| Laconia Slasher | 24000 |
| Laser Shot | 6200 |
| Plasma Cannon | 32000 |
| Armor Shop | |
|---|---|
| Laconia Gear | 28000 |
| Laconia Cape | 36000 |
| Sandals | 180 |
| Hirza Boots | 9800 |
| Ceramic Emel | 9700 |
| Laconia Shield | 13000 |
It"s been a while since the next new town, so you"ll probably have acquired tons of Meseta, but the sheer outrageous prices of the equipment here will still probably deplete your funds in no time flat. It would probably be for the best to visit the other towns first and survey what equipment each has, and purchase the best from each.
Once you reach Aukba, you can now teleport here from any other town, or back to the spaceship at Skure. However, you cannot teleport from Skure back to the towns, which raises the need of having to go through Skure every time you want to get back to Dezo from Paseo (which can be quite annoying).
Take a look around, then teleport back to Skure and get ready for the next trip.
Trip #2: Zosa
From the center of Skure, take the corridor to the north and follow it until you see a path leading off to the west. Go west, and it will turn south. Now follow it all the way south until you hit the wall, then east and down the chute. Downstairs, there will be paths leading to the north and east. Go north and open up the box to obtain 6,400 Meseta, then continue north and go down the first chute. Follow the path down and around until you reach another chute, and ride it back upstairs.
Now walk north until the path splits to the left and right, and take right path. Open the box you come across to obtain a pair of Garda Boots (equippable by the males), then continue east and up the stairs at the dead-end to reach the surface. You"ll find the town of Zosa located far to the north-east of the exit of Skure.
Town of Zosa Map
| Item Shop | |
|---|---|
| Dimate | 60 |
| Hidapipe | 280 |
| Weapon Shop | |
|---|---|
| Boomerang | 180 |
| Ceramic Sword | 3200 |
| Laconia Mace | 16800 |
| Laconia Slasher | 24000 |
| Acidshot | 4800 |
| Pulse Vulcan | 48000 |
| Armor Shop | |
|---|---|
| Laconia Helmet | 29000 |
| Laconinish | 35000 |
| Laconia Cape | 36000 |
| Long Boots | 6800 |
| Shune Boots | 7500 |
| Laconia Emel | 12000 |
Once again, take a look around town and scope out the shops, but hold off on buying anything just yet. When you"re ready, teleport back to Skure and get ready for the last trip!
Trip #3: Ryuon
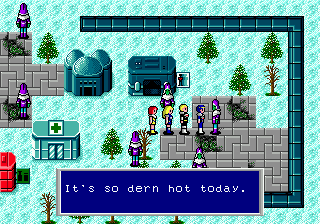 A hot villager in Ryuon
The last town isn"t too hard to reach, as you already know half the way there, whether you think you do or not. Follow the directions from Trip #2 all the way up until the point where you hit the left/right branch, and went right for the Gardaboots (just near the exit to Zosa). As you may have guessed, take the left branch, and go down the chute at its end.
Walk along the corridor to the east and south, and note that the first passage left leads to a box containing 15,000 Meseta! Grab it, then continue south until you reach another passage leading off to the left. Go in that direction, and ride up the chute at the dead-end. The chute directly to your south leads back up the surface! You"ll find the last town, Ryuon, a good distance to the south and east of the exit to Skure.
Town of Ryuon Map
| Item Shop | |
|---|---|
| Trimate | 160 |
| Escapipe | 70 |
| Weapon Shop | |
|---|---|
| Knife | 100 |
| Laser Slasher | 6700 |
| Laconia Dagger | 18400 |
| Laconia Sword | 22000 |
| Vulcan | 12600 |
| Laser Cannon | 20000 |
| Armor Shop | |
|---|---|
| Ribbon | 80 |
| Laconinish | 35000 |
| Laconia Chest | 28000 |
| Garda Boots | 12400 |
| Laconia Emel | 12000 |
| Laconia Shield | 13000 |
Once again, feel free to wander around town and scope out the item and equipment shops. Keep in mind that this is the last time you"ll ever have to purchase equipment, so stay calm! ;)
Upon visiting all three towns, you should start purchasing some of this equipment. The optimum equipment for each character is as follows:
- Rolf : Laconia Sword, Laconia Helmet, Garda Boots
- Rudo : Laser Cannon, Laconia Gear, Garda Boots, Laconinish
- Amy : Laconia Emel, Hirza Boots
- Hugh : Laconia Chest, Laconia Gear, Garda Boots
- Anna : 2 Laconia Slashers, Laconia Cape, Shune Boots
- Kain : 2 Laconia Maces, Laconinish, Laconia Helmet, Garda Boots
- Shir : 2 Laconia Daggers, Shune Boots
On the surface around Ryuon is an ideal place to gain both experience and meseta, and since you"re right next to a town you don"t have to worry (as much) about getting killed. I highly recommend staying around and building up enough money to purchase all the equipment for the characters you plan to use, as it will really help out. The monsters on Dezo, as you"ve probably already seen, are tough.
After purchasing your new equipment and gaining a few levels, we should start searching for that person that Tyler spoke about. He can be found in the Esper Mansion, which is located across the Crevice. This can be accessed by traversing across the "Crevice" which is located near the town of Aukba. Stock up on Trimates if you need, then teleport back to Aukba and set out for the Esper Mansion!
Esper Mansion
The “Crevice” is located to the southwest of Aukba. To get there, head west from Aukba until you hit the trees, then go southwest from there to reach a giant gaping hole in the ground. This is the "Crevice". On the eastern side of it is a small ramp that leads down to the bottom. By going down into the Crevice and coming up the other side, we can get to the Esper Mansion.
Crevice Map
| My Level | Rolf L24, Rudo L21, Anna L21, Amy L20 |
| Items | none |
| Monsters | Skytiara, Elephant, Aerotank, Ohx, Owltalon, Orangah, Dezo Owl, Mastodon |
The Crevice isn"t really big, and it doesn"t contain any treasure. It has several exits, and as you would guess, only one of them leads to the Esper Mansion... the rest lead to dead-ends. The monsters in here (for the most part) aren"t any tougher than those outside, so you shouldn"t have to worry too much about getting through this dungeon alive. However, do your best to keep Rolf alive throughout the dungeon... if he is not alive when you reach Esper Mansion you will not be able to get inside!
Upon entering the Crevice, proceed to the left until you reach a large pit. Be careful not to fall down it, and walk around the north side of the pit, and into the room to the north. Descend the stairs, and then follow the long, narrow, winding corridor to the southwest until you reach another large room with some stairs leading back up. Ignore these, and continue along the corridor until you reach it"s end, where there are some stairs leading further down. Descend once more, and continue along the narrow winding corridor until you see some stairs leading back up. Take these back upstairs, and walk along the corridor some more (rather straight-forward, eh?), and ascend the stairs at the bottom-right corner.
Once back up on the top floor, just go north, west, then south and you"ll reach the staircase that leads up out of the Crevice. The Esper Mansion is just a short walk away! Once inside, walk forward and go downstairs to meet the mysterious man known as Lutz, who has been in a cryogenic sleep ever since the Mother Brain arrived in Algo. However, once Rolf and party arrive, Lutz will awaken and reveal to Rolf that he was the one who saved Rolf"s life during the accident that killed his parents when Rolf was but 10 years old!
He will also reveal that you are the last descendant of the heroine Alis (whom, as we all know, was the heroine of the first Phantasy Star game, and indeed the girl whom Rolf sees in his dream), and that Rolf is the only one who can save the world from the enemy who is trying to manipulate the Mother Brain. He will also give you the "Aeroprism", a magical item that allows you to see the four invisible dungeons that exist on the planet Dezolis. He also mentions the existence of eight "Nei" items... special pieces of equipment said to be the most powerful of their type of the world. He instructs you to gather the eight Nei items, then return to him. After speaking with him, be sure to pick up the Aeroprism in the chest! =D
As I said, there are four dungeons on Dezo, each containing two of the Nei items. As with the Dams, you can do the dungeons in any order you please, but the order I recommend tackling them in due to complexity and monsters fought is first Menobe, then Guaron, Ikuto, and finally Naval.
Head back to Aukba (either by walking or using the Ryuka technique if you saved there), and then prepare for the journey!
Dungeons of Dezo, Part One
The first dungeon, Menobe, is conveniently located just a short ways to the west of Aukba. Make sure you are prepared with Trimates and any other equipment that you might need to purchase, then set out for Menobe!
Menobe Map
| My Level | Rolf L26, Rudo L24, Anna L24, Amy L23 |
| Items | Nei Crown, Storm Gear, Color Scarf, Nei Helmet |
| Monsters | Wrestler, Mystcape, Eletusk, Skytiara, Orangoo, Darkside, Illusnst, Sakoff, Mr Death, Imagiomg, Mxdragon, Glosword |
Menobe consists of four reasonably complex floors, and is home to a lot of the Dezolian Bio-monsters. Like in all four of the dungeons on Dezolis, Menobe contains two of the eight Nei items.. the Nei Crown and the Nei Helmet.
After entering Menobe, proceed up the long walkway to the north, past the two statues. You"ll be on the north side of the floor (obviously), and there are three staircases here.. one to your left, one to your right, and one behind the enclosure to the north. Take the left one upstairs to floor two. Head south into a fairly large room, and make your way to the south-east corner. There, you"ll find a corridor leading along the edge of the "sky". Follow this corridor until you reach the far south-west corner where there is a chest, which contains another Storm Gear. Take it, then retrace your steps, all the way back down to the first floor.
This time, ascend the staircase on the right of the enclosure. Follow the path to the south until you reach a staircase (going down) at the south edge of the floor. Ignore it, and walk due east from the staircase until you hit a statue. From that statue, walk north into a room with staircases leading up and down. Take the one leading up to find a Colorscarf, then go back down and return to the statue I just mentioned. From there, walk to the north-east, passing by another set of stairs. Once you reach the north-east corner, head left, and into the room to your south. Ignore the stairs in here as well. Just to the south of the stairs are two statues near a corner. It would seem that the statues are blocking the path here, but you can actually move around them by walking around their right side (as in Climatrol, the path beneath them is so narrow that the wall conceals it). Using this little "shortcut", proceed into the room to the south and west.
You"ll see some stairs leading up on the west side of this room. Ignore these, and go in to the small room to your north. There are stairs leading down here... descend them to reach a small isolated room on the first floor with a chest containing the NEICROWN! The Neicrown is the best piece of head equipment for the ladies, I recommend equipping it to Amy to help out her defense a bit. The Nei Helmet (Neimet) is a bit harder to reach, so for now I suggest teleporting out of here and returning to Aukba for a quick rest.
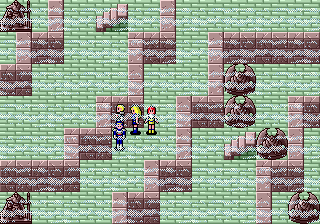 Inside Menobe Dungeon
Back at the entrance of Menobe (after having rested, and saved of course), walk straight up to the staircases once again, and ascend the one behind the enclosure (to get inside, just walk around to the north side). Once upstairs, walk north a short ways at the path will split left and right. Go left, and follow this path all the way around until you reach the west side of the floor. Continue south, ignoring the room off to your right. Once you reach the next large room, you"ll find a staircase leading up in the (near about) center of the room. Ignore this one, and head due north into another room with another staircase leading up. Ascend this one up to floor 3, then follow the path to the right, all the way around the outside of this floor, until you reach the eastern side.
At the very end of this path, you"ll come to a stairway leading up to the top floor. Go upstairs, take a few steps right, then follow the corridor to the south... once again, all the way around the outside of the floor. As soon as you get on the left side of the "sky barrier", look for a path leading off to your west, and go in that direction to reach a staircase leading back downstairs. Use this one to go back downstairs, and take up your well-earned treasure, the NEIMET! The Neimet is the strongest piece of head equipment in the game, and it is equippable by Rolf and Kain. Since I didn"t have Kain in my party at this point, I equipped it on Rolf.
Now that you have the two Nei items in here, get the heck out of here and head back to town and rest, and re-stock up on medicine. Our next stop is the dungeon of Guaron. Monster-wise, it is slightly more difficult than Menobe, and it is also the largest dungeon in the game, hosting no less than 16 floors! Fortunately, most of them are one-room floors, similar to the lower levels of Climatrol. Guaron is located near the town of Ryuon, so, whenever you"re ready, use the teleport station to quickly scoot back to Ryuon. You"ll find Guaron in the north-east corner of the Ryuon "area"... it"s quite a distance to the north of the actual town.
Guaron Map
| My Level | Rolf L28, Rudo L27, Anna L27, Amy L26 |
| Items | Amber Robe, Laconinish, Crystal Chest, Nei Cape, Crystal Cape, Nei Armor |
| Monsters | Skytiara, Wrestler, Mystcape, Eletusk, Orangoo, Darkside, Sakoff, Mesoman, Mxdragon, Firefall, Frdragon, Vorcano, Kinglava, Darkside |
Though Guaron consists of 16 (!) floors, the layout thankfully isn"t too complex. Upon entering Guaron, move to the west along the outside of the actual dungeon, and you"ll reach a remote set of rooms in the far south-west corner. Move all the way to the west, and in the far southwest room you"ll find a treasure chest containing a Laconinish. Take it, then backtrack to where you started, and move north into the "actual dungeon".
At the first intersection, go right, and follow the corridor all the way around to the top, where you will find an Amber Robe. Take it, then go back to the intersection and continue north, where you"ll reach another intersection. Here, go left, north, then left again until you reach the outside area in the north-west corner. This is a maze-like sea of trees, and the only thing I can tell you here is first move west through the center, then make south as soon as you can. You"ll first come to a room with four staircases, but all lead to the same dead-end room. Instead, move right from the entrance to that room, and enter the next room on the right. In this circular room is a stairway leading up... ascend it to floor 2.
Here, you"ll learn the basic layout of the majority of the floors in Guaron... a small circular room with a pit in the center, and two staircases. However, there is a bit more to explore on this floor. Take the right exit from this room, and you"ll see a north/south junction. Go north, then follow the corridor around the outside of the floor until you see a path leading off to the east. Go that way, and enter the next small room which holds a stairway leading down and a treasure chest containing a Crystal Chest. Take the chest, then head back to the initial room (the one with the pit and staircases). Using the various stairs in the identical-looking rooms, ascend all the way up to floor 8. If you happen to lose count, you"ll know it when you see it.. like floor 2, it is different from the others.
On floor 8, you"ll notice a path in the south-west corner leading off to a maze-like series of passages in the southwest. There are two distinct paths from the pit/stairs room... to the south and west. Go west, and follow along the path until you reach the bottom, where there will be a left/right junction. Go left once again, and after a bit of walking you"ll come to a treasure chest containing the NEICAPE! The Nei Cape is the best Cape-type piece of armor, equippable by the ladies. I recommend giving it to either Anna or Amy.
After getting the treasure, make your way back to the pit/stairs room, and ascend to floor 9. Take the eastern exit from this room to reach another maze-like room filled with trees. First head south to the south edge of the floor, then all the way right to the east edge. Then go north a little ways, then back left to reach the room in the center of the floor, which contains a Crystal Cape. After getting it, return once more to the pit/stairs room. Now, ascend all the way up to floor 16... the top floor.
Here, all you have to do is make your way into the room in the middle and take the treasure chest. However, be careful as the enemies on the top floor of Guaron are VERY strong. The chest contains the NEIARMOR, the best suit of armor in the game, equippable by Rudo and Kain. This should be equipped on Rudo. And now, we have the two Nei treasures in this dungeon, so teleport out of here and head back to town for a well-deserved rest. 4 down, and 4 to go!
Dungeons of Dezo, Part Two
Our next stop is the dungeon of Ikuto, located near the town of Zosa. Ikuto is by far my least favorite dungeon in the game, as the layout is simply horrible, and without a map or directions you can get lost and stay that way for ages in here. Come prepared with a full load of Trimates... you may need them.
Ikuto is located far to the west of Zosa. It"s to the north of the exit leading to Skure, in the midst of the mountains.
Ikuto Map
| My Level | Rolf L30, Rudo L28, Anna L28, Amy L27 |
| Items | Laconia Dagger, Plasma Cannon, Fire Staff, Laconia Mace, Nei Shot, Nei Slasher |
| Monsters | Darkside, Glosword, Mesoman, Wrestler, Mystcape, Frdragon, Lung, Owltalon, Sakoff, Desrona, Wizard, Capeone, Mr Death, Shadow |
Put simply, Ikuto is a nightmare. It consists of seven floors, and the only way to go down to the next floor is by falling into pits. The floors get bigger as they go down, and your objective is to fall into the correct pits to get where you need to go. However, since there are so damn many pits around, it"s ridiculously easy to get lost. Once you hit the bottom floor, there is a series of stairways you can use to get back up, but I"ve found it"s just easier to use the Hinas technique.
Thus, I"ve provided locations to each of the treasures from the starting point. I"ve found it"s the easiest way to get through here... just wandering around and falling down random pits will just get you lost. After obtaining each, just use the Hinas technique to quickly escape Ikuto, then move onto the next.
- Laconia Dagger/Plasma Cannon - You can get both of these in one shot. On floor 1, fall down the middle pit, then go south. Fall down the middle pit once again, go northeast, grab the chest to find the Laconia Dagger. Fall down the pit directly to the northwest of the Laconia Dagger, then follow the corridor all the way to the south and west until you reach the dead-end, where you"ll find a Plasma Cannon in a chest.
- Laconia Mace - On Floor 1, fall down the left pit. Make for the south edge of this floor, and fall down the pit along the south wall. Walk west, past two pits, and then north. You"ll come to a pit at a dead-end... fall down it. Now fall down the pit directly to your southwest. Now head for the south edge of the room you"re in and pick up the chest to get your Laconia Mace.
- Fire Staff - On Floor 1, fall down the right pit. Then fall down the pit directly to your south, then walk south and you"ll see three more pits. Fall down the one on your left, and on the next floor you"ll see one pit directly to your north, and one to the left. Fall down the one on the left, then walk south, and follow the long winding corridor until you reach it"s end, where the chest containing the Fire Staff is.
- Nei Shot - On the top floor, fall down the middle pit. Walk south, fall down the pit on the left, then fall down the pit directly to your left. From here go east, north, then west again, past a pit, until you reach the dead-end, where another pit is. Fall down this one, and you"ll be in a small room with pits in each corner. Fall in the pit in the north-west corner, then move west to collect your prize, the NEISHOT! This is the best gun in the game, and of course should be equipped on Rudo!
- Nei Slasher - On the top floor, first fall down the left pit. Walk south, then fall in the next pit you come to. Go left to find three more pits... once again fall down the one on the left. Make your way left past a few pits until you hit the wall, then go north to reach a pit in the far north-west corner. Fall down this one, then go north to the NW corner, then east to the NE corner. Go south to find yet three more pits. This time fall down the middle one, then make your way all the way to the southern edge of this room to find the chest containing the NEISLASHER! This is the best slasher weapon in the game, and should be equipped on Anna.
Whew! That"s everything... now teleport out of here and be glad that you never have to suffer through this dungeon again.
The last two Nei treasures are in the dungeon of Naval. Even though structure-wise Naval is the least complicated of the four, the monsters contained within are extremely strong. There is also no town near Naval, and it"s a pain in the arse to get to, so I tend to save it for last. Naval is located out the fourth exit of Skure, so head back to the nearest town, make sure you are completely ready and have re-stocked up on Trimates, and then use the teleport station to teleport to Skure. Here we go!
Starting from the center of Skure as always, follow the corridor to the north, and then take the first branch off to the left. From here make your way south and west, to the south-west corner of the floor, where there is a chute leading down. Go downstairs, and you"ll be at a T-junction with paths leading off to the north, south, and east... all of which lead to chutes leading down to the bottom floor. Go south, ride the chute downstairs, and follow the corridor north and west, until you see a path leading off to the south. That path leads to a dead-end where a box containing 18,000 Meseta can be found!
Grab the money, then go back north, and continue west until you reach some stairs leading back up. Go back upstairs, and there will be paths to the north and east. First go east to find a pair of boxes, one of which contains 12,000 Meseta! Then go back and take the north path, and at the intersection, continue north and up the stairs to reach the surface of Dezo. From here, Naval is just a not-so-short walk to the south-east... it is located in the far south-east reach of this area of Dezo. Now let"s check this place out!
Naval Map
| My Level | Rolf L32, Rudo L30, Anna L30, Amy L29 |
| Items | Nei Shield, Trimate, Truth Sleeves, Green Sleeves, Laconia Emel, Mirror Emel, Nei Emel |
| Monsters | Wrestler, Mystcape, Sakoff, Archdrgn, Wizard, Frdragon, Firefall, Capeone, Mr Death, Illusnst, Imagiomg, Fiend, Darkside, Shadow |
The layout of Naval is actually quite simple, but it can be a bit repetitive. It consists of five floors, mostly comprised of huge pits, with catwalks of corridors circling the outside. All the treasure in the dungeon is on the second floor, and to get to them, you must fall from the top floor, down to the second. There are four "sections" on the second floor... "north", "south", "east", and "west", and to get to each, you must fall from the respective side of the pit on the fifth floor. For example, if you want to reach the "west" section of floor 2, you"ll have to fall off the "west" side of the pit on the top floor. However, another thing to note is that it does matter which side you fall off on! If you are on the "north" side, for example, you will have to walk east off the pit in order to land on the "island" below. The rule here is... take the side you"re on "north/south/east/west", and go clockwise one direction. This is the direction you"ll need to walk off. Thus, North = East, East = South, South = West, and West = North.
So, here"s what you do. Upon entering Naval you"ll find yourself outside the actual "dungeon" area. The layout is circular, and to get inside, just walk a short ways to the north and enter the break in the wall on the western side. There are two stairways on the bottom floor.. one in the upper-left, and one in the lower-right. The one in the upper-left lets you access the south and east sides of the pit, while the one in the lower-right lets you access the north and west sides of the pit. After going up, all you have to do is follow the straight-forward path all the way to the top (the issue here is not getting killed by the monsters along the way). On the top floor, there will be four catwalks extending out into the middle of the pit (from the north, south, west, and east sides of course). Just walk out onto the very edge of the catwalk then jump into the pit (again, make sure you falling off in the right direction!), and you will be dumped down to the floor below. Keep walking off in the same direction, and you"ll end up on the respective section on floor two, where there is treasure waiting!
- NORTH: NEISHIELD
- WEST: TRIMATE, TRUTH SLEEVES
- EAST: LACON EMEL, GREEN SLEEVES, MIRROR EMEL
- SOUTH: NEI EMEL
Remember, use the lower-right stairs to get to the "South" and "East" sections, and the upper-left stairs to get to the "North" and "West" sections. As I said, this dungeon is just a matter of not getting killed by the monsters. Also, don"t be afraid to go back to town and rest if you"re hurt... the monsters around here can be quite tough, and the treasure can wait. Even so, you"ll want to Save with the Visiphone every once in a while... getting caught off-guard, even when you think your party is healthy, can be extremely dangerous. The two Nei treasures in here are the NEISHIELD, located in the north... and the NEI EMEL, located in the south. Both are the best "free-hand" equipment in the game... the Nei Emel is only equippable by Anna, and if you have Kain and are willing to sacrifice one of his weapons, feel free to equip him with the Shield. Otherwise, just hold onto it.
At last, we have all eight of the Nei items! Make one last trip back to Aukba to heal up and re-stock on Trimates, and get ready for the final battle! If you haven"t paid much attention your levels lately, you may want to hang around and gain experience for a while. Though it probably seems a bit high, Rolf gains the "Megid" technique at level 35... this is a very useful technique, and the most powerful one in the game, even though it"s power does come at the expense of some of your party"s HP. It"s nothing a little healing can"t fix, but if you plan on using it, bring along a Star Mist to compensate. In fact, if you are low on Star Mists, you may want to go back to Paseo on Mota and have Shir attempt to steal some from the Item shops. It will probably take a while, but they will be greatly helpful in the final battle!
The Final Battlefield
When you"re finally ready, head across the Crevice once again, and re-enter Esper Mansion. Now that you have all eight Nei items, Lutz will acknowledge you as a true descendant of Alis and tell you his story. After her battle 1000 years ago, Algo shortly obtained peace, but after Mother Brain was created, the people became dependent on it and forgot what they really needed. Meanwhile, someone set a "trap" in Mother Brain to weaken the minds of the people of Algo, and eventually destroy it. Lutz then gives you the ninth and final Nei item... the Nei Sword, the ultimate weapon. Pick it and equip it to Rolf (darn nice weapon might I add!), then talk to Lutz once more.
When he asks you his question, answer "No" and he will fully heal your party. Now go back and say "Yes", and he will transport you to the final battlefield, Noah!!
Noah Map
| My Level | Rolf L35, Rudo L34, Anna L34, Amy L33 |
| Items | none |
| Monsters | Mxdragon, Mesoman, Archdrgn, Firefall, Lung, Frdragon, Imagiomg, Fiend, Wrestler, Mystcape, Illusnst, Sakoff, Wizard, Capeone, Desrona, Glosword, Vorcano, Kinglava |
*NOTE* If at any time you wish to exit Noah, use the Nei Sword and you will automatically be transported back to the Esper Mansion. Use this in if you are in dire need of healing!
Noah consists of two floors, and though they are rather large, it isn"t really the most complicated of dungeons. The monsters you fight are obviously the strongest in the game, but no stronger than what you have already seen, especially in Naval. There are no treasures, either... your only task here is to find the Mother Brain and whoever... or whatever... is trying to destroy Algo!
You start at a left/right junction of paths, both of which lead to stairs. Go right, and follow along the path until you reach the dead-end, and climb the stairs there. Once upstairs, go left and down the other set of stairs, then move left, and take the path leading off to the north. Walk until you reach another room. You"ll see a stairway off to the south, but ignore it. Move further north and take the path leading off to the west, and ascend the stairs at the end. Now walk north through a large open room, and descend the stairs near the north wall.
You"ll be at a left/right junction once again. Go left, and walk until you reach another stairway. Go back up, then walk north until you hit the wall, then east, past a staircase. Descend the staircase near the far right wall, then walk north a short ways and up the next stairway. Walk along the corridor some more, descend once again, then go north, back up, north again, back down again (tired yet?), then go south and west into a larger room. Take the stairs furthest to the north in this room, then go west and follow the corridor until you reach the dead-end, and descend the stairs. In the next room, go west until you hit the wall, then go up through a narrow corridor until you reach another larger room. Now heal yourself up and prepare for one of those rare boss fights!
To the north, you"ll see a treasure chest blocking the path? What"s this? Open it up and you"ll find this isn"t a treasure at all! This is another trap! This box contains an evil entity known as Dark Force, and now that you have released it, it attacks!!
Boss Battle: Dark Force
| Hit Points | 2,560 |
| Attack Power | 320 |
| Defense Power | 30 |
| Experience | 2,222 |
| Meseta | 0 |
| Special | Possess an ally |
Yeek! This thing is huge, and to make matters worse, it takes up so much of the screen that you can"t tell how much damage you"re doing to it! Dark Force has 2,560 HP but this information obviously doesn"t help you a bit, considering you can"t see how much damage you"re doing! All I can say here is just attack with your weapons... unless you"re planning on warping back to Esper Mansion after the battle try to conserve Rolf"s TP. If not, use the Megid technique to immediately knock off a good bit of Dark Force"s HP, then have someone use a Star Mist to heal your party back up. Afterwards, have Rolf repeatedly throw out the NAFOI technique. Dark Force has an extremely annoying ability that causes one party member to become "Evil", unable to do anything until the condition wears off. Even more annoying, this can cause the inflicted character to lose their ability to use technique, which can make a REAL mess. And if that weren"t enough, they may also search through and/or steal items from other party members, usually healing items like Star Mists which are crucial to the battle. After a round, the Nei Sword may emit a bright light, which dispels the "Evil" condition from any afflicted party members. Dark Force"s other attack, an electricity beam which damages all party members, is also very damaging, and should be countered with a Star Mist or a GISAR technique. This will be quite a lengthy battle due to Dark Force"s high amount of HP, but provided you have enough TP and/or healing items, you should be able to win.
After the battle, use the Nei Sword to go back to Esper Mansion and rest up and, more importantly, SAVE the game. Once you"re healed and ready, trek through Noah once again and make your way back to where the chest used to be. Head north and you"ll be at yet another left/right junction. Head right, and then up the staircase that you come to. Upstairs, follow along the corridor a bit more, and soon you"ll end up at the Mother Brain. The "Mother Brain" will appear and you"ll be asked if you choose to fight. If you"re not yet ready, say "No" and you"ll be able to heal and/or prepare better for the fight. Once you"re ready say "Yes" and the Mother Brain will proclaim that if she were to malfunction, the people of Algo would die, since they have become so dependent on her. She asks once again for you to change your mind. Say "No" and the fight will begin!!
Boss Battle: Mother Brain
| Hit Points | 2,450 |
| Attack Power | 228 |
| Defense Power | 128 |
| Experience | 0 |
| Meseta | 0 |
| Special | Attack all allies with Nova attack |
Once again, Mother Brain is so large that you won"t be able to tell how much damage you are doing to her. Mother Brain is actually considerably weaker than Dark Force... her Attack Power and HP are lower, and she doesn"t have that incredibly annoying possession skill, but her defense is a bit higher. Just as you did in the battle before, start off by having Rolf throw out the Megid technique, and have someone else use a Star Mist to repair the damage. Then, have Rolf cast Nafoi while Amy heals the party, either with Star Mists or the GISAR technique. Everyone else should attack. Mother Brain will either attack one or all of your party members with her Nova attack, and though it deals quite a bit of damage, it still isn"t as powerful as Dark Force"s attack. Just keep up your attack, and given enough TP, you should be able to defeat her.
After defeating Mother Brain, well.. you"ve won! I"m not going to spoil the ending for you, so just sit back and watch the rest of it... you"ve surely earned it. Congratulations!
Ролевые игры - редкий жанр для приставки «Sega», но «Phantasy Star» - действительно культовое явление в мире RPG. Бесконечный сериал о межзвездных похождениях супергероев сначала заворожил японцев, а потом огромным тиражом выплеснулся на мировой рынок.
Где-то в глубине Галактики Андромеда находится звездная система Алго. Вокруг главной звезды - Алго - вращаются три планеты. Первая из них - Палм, на ней находится правительство этой звездной системы. Правители, высокопоставленные чиновники и великие мыслители, живут в огромных башнях из слоновой кости, вдали от мирской суеты.
Другая планета носит название Мота, се сравнивают с прекрасным драгоценным камнем. Некогда се поверхность представляла собой бесплодную пустыню, кишащую муравьиными львами, но стараниями своих жителей бесплодная пустыня превратилась в цветущий сад. На огромных фермах выращивают пищевые культуры, нет недостатка и в воде, орошающей бескрайние поля. Жизнь на Моте прекрасна и легка, люди имеют все, что только можно пожелать, и нет нужды добывать себе пропитание тяжелым изнурительным трудом.
Самая дальняя планета называется Дезо. Про эту темную таинственную планету почти ничего не известно, за исключением того, что ее поверхность покрыта льдом.
Прошла почти тысяча лет с тех пор, как Элис со своими друзьями избавили Алго от порождения сил зла - Лэссиц. С тех пор Алго процветает под управлением гигантского суперкомпьютера, который называется Материнский Мозг. Это чудо техники управляет Башней Климата, Лабораторией Биосистем и множеством других полезных вещей, жизненно необходимых жителям Моты.
Казалось бы, все хорошо, но вашему герою каждую ночь снятся кошмары. Вернее, один и тот же кошмар - маленькая девочка сражается с гигантским злобным демоном, вы находитесь рядом, но ничем не можете ей помочь, вам остается только смотреть, как ребенок сражается за свою жизнь, и вы просыпаетесь в холодном поту.
Ночные кошмары, конечно, не могут не огорчать пас, но времени расстраиваться нет - у пас слишком много работы. Вы работаете в Пасео - столице Моты, служите у Командующего Столицей, в чьи обязанности входит претворять в жизнь планы Материнского Мозга. Он считает, что этот суперкомпьютер не может совершать ошибок, но недавнее нашествие монстров на города Моты наводит на странные размышления. На планете разрастается паника, люди покидают города. Командующий, разумеется, хочет узнать, что именно породило монстров и как именно с ними бороться. Он посылает вас в Лабораторию Биосистем, там вы должны найти рекордер (некое записывающее устройство). Расшифровка и тщательный анализ записей этого рекордера поможет найти способ победить биомонстров.
Вы возвращаетесь домой, чтобы подготовиться к миссии. Ваша подружка - Ней - очень обеспокоена, она не хочет отпускать вас, но поскольку вы не собираетесь отказываться выполнять приказ начальства, она просит взять вас с собой. Ней - продукт местных биологических экспериментов - получеловек-полуживотное. Такие существа являются изгоями в обществе Алго. Семь месяцев назад вы из жалости взяли се к себе в дом и с тех пор стали, по сути, ее старшим братом.
Так начинается эта замечательная игра, одна из лучших ролевых игр на Мегадрайв. Кстати, первой части на Мегадрайв нет - она была на восьмибитной Sega Master System. Игра сочетает в себе и прекрасный сюжет, и тщательно продуманный игровой процесс.
Обратите внимание на то, что пятерых из шести спутников, которых вы встретите на пути, можно переименовать - присвоить те имена, которые вам нравятся. Но в нашем описании мы сохранили те имена, которые даны по умолчанию. Главного героя, которого по умолчанию зовут Рольф, тоже можно назвать по-своему. А вот Ней переименовать нельзя, очевидно, разработчикам игры очень понравилось это имя.
Управление и меню
Крестовина - направление движения.
А - исследовать местность.
В - отменить.
С - просмотреть показатели персонажей, подтвердить.
Нажав на С , вы увидите пять кнопок:
Item - снаряжение. Выберите персонажа и проверьте, какие веши у него есть. Нажав на соответствующий предмет, вы сможете его применить (Use), передать другому члену отряда (Giv) и выбросить (Tos).
State - уровень. Нажав на еще одну кнопку State, вы видите панели с жизненными пунктами (HP), пунктами применения техник (TP), уровнем и именем персонажа. Первая цифра - показатели на данный момент, вторая - максимально возможное число. Нажав Order, вы можете поменять спутников местами.
Tech - применение техник. Так в мире звезды Алго называется то, что мы бы назвали магией. Вам сразу покажут, сколько жизненных и технических пунктов у каждого персонажа. Выберите героя и нажмите на название нужной вам техники. Естественно, пунктов техники убавится.
Strng - показатели героя. На нижней правой палетке вы увидите, какое снаряжение надето на какие части тела, на верхней левой - имя, уровень и накопленный опыт, на правой верхней жизненные и технические пункты, на правой нижней - параметры, традиционные для ролевых игр:
Strnght - сила
Mental - психическая сила
Agility - ловкость
Luck - удача
Dextrty - стойкость
Attack - атака
Defense - защита
Eqp - экипировка. Те же показатели, расположенные несколько в другом порядке. Будьте осторожны, в этой опции очень просто выбросить что-нибудь из одежды.
В бою
В нижней части экрана есть две кнопки. Нажимая на верхнюю (Fght), вы посылаете персонажа в атаку, нажав нижнюю (Stgy), выбираете еще из двух возможностей. Ordr - курсором выбрать иконку персонажа и отдать приказ атаковать, применить технику, применить снаряжение, воспользоваться артефактом. Run - сбежать с поля боя.
Герои игры
В начале 90-х годов в Японии был выпущен модем для Sega Megadrive и существовала служба поддержки для этого устройства, которая в основном распространяла текстовые ролевые игры на японском языке (за пределами Японии модем для Sega не продавался).
Среди этих игр были и восемь игр, посвященных героям Phantasy Star II. В них рассказывалось о том, что происходило с героями игры до начала действия основной игры. Потом эти игры были изданы на Sega CD, но в нашей стране Sega CD особой популярностью никогда не пользовалась, а уж тем более не пользовались популярностью текстовые игры на японском языке.
Но, тем не менее, благодаря этим играм мы можем узнать более подробные биографии героев в игры.
Рольф
Родом с Палмы, в 10 лет остался сиротой - родители погибли во время катастрофы космического корабля. Как раз после этой катастрофы Материнский Мозг наложил запрет на все космические полеты, за исключением тех, которые проходят под его непосредственным контролем.
Воспитание получил в интернате на Моте. После окончания академии два года служил в Службе Безопасности. А из текстовой игры, посвященной Рольфу, можно узнать о том, что биомонстры существовали до катастрофы в Лаборатории Биосистем. И сражаясь с ними, Рольф и приобрел навыки, которые так пригодились ему в основной игре.
Ней
Ней появилась на свет в результате эксперимента, проводимого в Лаборатории Биосистем - ученые пытались совместить клетки человека и животного. Во время катастрофы, случившейся в Лаборатории, ей удалось сбежать. Семь месяцев назад она была еще беззащитным ребенком и от расправы напуганных нашествием биомонстров людей её спас Рольф. Он взял ее к себе в дом и воспитывал как младшую сестру.
Поскольку Ней не человек, ей удалось за семь месяцев стремительно повзрослеть (такой вот у нее метаболизм) и ныне, не взирая на свой юный возраст (Ней на 20 лет моложе Рольфа), она уже взрослая девушка и весьма неплохой боец.
Ней быстрее других персонажей набирает очки опыта, зато она быстро утомляется и не может носить тяжелых доспехов.
Из текстовой игры можно узнать, что до Рольфа ее пыталась удочерить еще одна семья, но кончилось эта попытка не слишком удачно - семью вырезали бандиты.
Рудо
Монстры убили жену и дочь Рудо, так что нет ничего удивительно в том, что он живет местью. Своим призванием он избрал охоту на биомонстров. Как бойцу ему просто нет равных - он с легкостью носит самые тяжелые доспехи, играючи управляется с самым тяжелым оружием - например, с разного рода пушками, один выстрел из которых укладывает сразу несколько рядовых врагов.
Правда, техниками - местной разновидностью магии - Рудо почти не владеет, а с другой стороны - зачем они ему сдались.
Эми
Эми успела окончить мединститут как раз к началу событий игры. И без работы она, как легко догадаться, не останется. Вот только лечить ей придется не насморк и не прочие банальные болезни, а раны, полученные в боях с монстрами.
В искусстве врачевания у нее просто нет конкурентов. Правда, научившись врачевать, она так и не научилась убивать - боец из нее никудышный. Из оружия она может пользоваться только парализатором, да и тот не всегда срабатывает.
В текстовой игре описывается ее путешествие в соседний город, где после очередного нападения монстров скопилось много тяжелораненых. По дороге к этому городу она сама чуть не стала добычей монстров.
Хью
Это биолог, специалист по монстрам. Он почти не умеет сражаться, совсем не умеет лечить раны, зато владеет специальными техниками, которые позволяют наносить повреждения монстрам.
В текстовой игре Хью проводит расследование - вместе со своей подружкой пытается понять, откуда взялись монстры в подвалах его родного университета.
Кейн
Кейн - недоучившийся инженер. Чинить технику он не умеет, зато умеет прекрасно ее ломать. Казалось бы, зачем нужен такой персонаж - вдруг сломает что-нибудь полезное?
Но тем не менее без Кейна вам просто не обойтись - кто как не он умеет выводить из строя роботов, которые станут вашей настоящей головной болью где-то с середины игры.
В текстовой игре Кейн защищает свой дом, где он живет в полном одиночестве, от набегов роботов, которыми управляет Материнский Мозг.
Анна
Анна в свое время работала на Службу Безопасности и прекрасно справлялась со свой работой. Она является одним из самых сильных бойцов в игре, к тому же владеет самым эффективным в игре оружием.
По каким-то причинам (наверняка личным, но точно об этом ничего не известно) она смертельно ненавидит бандитов и убивает их при первом же удобном случае.
В текстовой игре она охотится за очередной бандой, кравшей некий важный документ, предоставленный Материнским Мозгом.
Шир
Шир родилась в очень богатой семье. К жизни она относится весьма легкомысленно, ее интересуют только острые впечатления. А какую массу острых впечатлений можно получить совершая кражи, скажем, в магазинах! Поэтому нет ничего удивительно в том, что Шир стала воровкой. И не просто воровкой, а воровкой с большой буквы - настоящим мастером в своем ремесле.
С ее помощью вы сможете бесплатно раздобыть массу дорогих и полезных вещей. Правда, после совершения кражи Шир исчезает и появляется у вас дома - следовательно, за ней приходится возвращаться. Если в Пасео - городе, в котором живет ваш герой - возращения домой не слишком утомительны, то в отдаленных городах, они начинают утомлять.
В текстовой игре Шир пытается украсть шедевр местного искусства со странным названием Опа-Опа, рыночная стоимость которого составляет ни много ни мало - миллиард месет.
Полное прохождение
Фаза I. Биомонстры
Пасео
Итак, вы с Ней выходите излома. Для начала побродите по улицам Пасео, чтобы изучить окрестности. В Пасео из заслуживающих внимания объектов есть магазин инструментов, оружейный магазин, магазин доспехов, станция телепортации, больница, лаборатория по производству клонов. Но такие объекты встречаются и за пределами Пасео, но в Пасео есть два здания, которые есть только в этом городе - это, в первую очередь, ваш дом (действительно, было бы странно, если бы у вас было по дому в каждом уголке планеты) и Центральная башня.
Разумеется, город и его окрестности отнюдь не безлюдны - вокруг полно прохожих, Вы можете поболтать с каждым
из них. Значительная часть того, что они говорят, не представляет никакого практического интереса. Но все же вы можете узнать от горожан И полезную информацию. Прохожие расскажут вам следующее:
- некий мерзавец по имени Дарум грабит и убивает людей на Северном мосту;
- лаборатория биосистем находится на другой стороне озера;
- вы можете сделать несколько копий своего тела в лаборатории клонирования, если у вас есть на это деньги;
- в ближайшие дни не ожидается дождей и озеро может пересохнуть;
- биолаборатория - источник процветания Моты.
Обратите внимание на женщину, которая скажет, что ей нравится Пасео тем, что в нем все тихо и мирно, и она собирается переехать в Пасео из Аримы. Запомните ее и отправляйтесь в Центральную Башню, в которой находится и библиотека.
Библиотека представляет собой набор файлов с информацией, поищите среди них все, что относится к Материнскому Мозгу, Лаборатории Биосистем и истории Моты. Обратите внимание на то, что ни в одном из файлов нет информации о том, когда и кем создан Материнский Мозг и где он вообще находится. А также обратите внимание на то, что в Лаборатории Биосистем произошел какой-то загадочный несчастный случай два года назад.
Теперь идите в Оружейный Магазин. Купите два стальных бруска для Ней. Благодаря этим брускам Ней сможет атаковать дважды за один ход.
Бой в этой игре имеет такую особенность, как «непрерывное сражение» - по окончании первого хода второй ход начинается автоматически и все персонажи продолжают совершать те же действия, которые они совершали на первом ходу. Если вы хотите заставить персонажа на следующем ходу делать что-нибудь другое, вы должны нажать на любую клавишу джойстика перед самым концом хода.
Арима
Пора действовать! Используйте Карту Моты, с помощью которой вы можете перемещаться по миру, и выберите город Арима.
Увы, Арима разрушена. На город напала банда каких-то мерзавцев и повзрывала большинство домов с помощью динамита. Множество мужчин были убиты, а множество женщин похищены. В руинах Аримы осталось лишь несколько человек. Поговорите с ними, и вы узнаете следующее: бандиты всегда приходят с востока, их логово находится в городе Шуре, свои ценности они держат в запертых контейнерах и, наконец, самое плохое известие динамит у них еще не кончился, осталось как минимум две динамитных шашки. Если их не отнять у негодяев, они взорвут еще какой-нибудь небольшой городок. А самой важной новостью является то, что Дарум вовсе не плохой человек, он стал жестоким из-за того, что какие-то ублюдки похитили его дочь Тею.
Возвращайтесь обратно в Пасео и подлечитесь в Госпитале, если вы уже успели где-то получить раны. В этой игре Госпиталь является единственным местом, где вы можете поправить здоровье. В столице лечение стоит дешево - всего 8 месет за каждого персонажа, а вот в других городах, в которые вы попадете, плата за лечение несравнимо выше.
Возвращайтесь домой. Дома вас ждет гость - солдат Рудо, переучившийся на охотника на биомонстров. Разумеется, он хочет, чтобы вы взяли его с собой. Рудо не владеет какими-то запредельными способами боя, нет, он просто умеет пользоваться тяжелым оружием, которым не может пользоваться никто, кроме неги.
В начале игры у него есть Fibercoat, Headgear, Bow Gun и Boots.
Решайте, стоит ли вам переименовать Рубо, а также стоит ли его включать в команду. На наш взгляд - стоит. Используйте меню Команд и сделайте так. чтобы Рубо стоял впереди, прикрывая прочих членов команды. У Рубо намного больше очков жизни и он лучше защищен, нежели Рольф, к тому же у него сильнее атака.
Теперь можно начать охоту на биомонстров, чтобы подзаработать очков опыта и наличных денег. Монстры в окрестностях Пасео не слишком сильны, но и ваша команда еще не набралась силы и опыта. Так что не отдаляйтесь от города до тех пор, пока у вас не появится возможность нести с собой медикаменты. Накопив немного денег, вы сможете купить второй нож для Рольфа и он тоже сможет делать по две атаки за один ход. Когда каждый член команды достигнет как минимум 5-го уровня, можете отправляться в Шуре.
Шуре
Монстры в Шуре уже более сильны и вам придется позаботится о правильной экипировке. Запаситесь такими вещами, как Monomate и Dimate, а также купите Escapipe и Telepipe. Как только появится такая возможность, купите в Ариме дробовик для
Используйте карту Моты, чтобы оказаться в здании Шуре. Подземелья в этой игре очень труднопроходимы из-за из своей запутанности. Крайне маловероятно, что у вас есть фирменный картридж с инструкцией, а жаль - в этой инструкции приведены карты всех подземелий. Наиболее удобно перемещаться по подземельям, спускаясь вверх или вниз по специальным трубам.
В Шуре вам нужно достичь 4-го уровня здания. По пути к этому уровню вы сможете найти немного денег. Extra Dimate и шлем для Рольфа. Все это полезное добро лежит в открытых контейнерах. На 4-ом уровне вы найдете контейнер, в котором лежит Серебряная лента для Ней. Кроме того, здесь в изобилии валяются трупы бандитов, по всей видимости, растерзанных биомонстрами. На одном из тел, валяющемся в юго-западной части уровня, вы найдете письмо и Небольшой Ключ.
Письмо, очевидно, является копией требования выкупа за дочку Дарума, которая содержится в башне Нидо. Сумма выкупа весьма
велика - 50 тысяч месет. Очевидно, для того, чтобы набрать такую огромную сумму денег, Дарум и занялся разбоем. Что не сделаешь для того, чтобы спасти любимую дочь.
Найденный ключ позволит вам открыть четыре контейнера, найденные на уровне 1. Там вы обнаружите деньги. Extra Monomate и две динамитные шашки. Используйте escapipe, чтобы выбраться из Шуре, а затем примените telepipe, чтобы вернуться в Пасео. Положите Небольшой Ключ в Камеру Хранения в Центральной Башне, он вам не понадобится до самого конца игры.
Башни Нидо
Прежде чем отправляться в Нидо, надо сначала снова поохотиться на монстров - набраться сше немного опыта и накопить денег. Ваши персонажи должны достичь 8 или 9 уровня, а денег должно хватить на следующие веши для Рольфа - Меч (за 1200 месет, пролается в Ариме) и Fibercoat (за 300 месет, продается в Пасео). И если вы ещё не купили дробовик для Рубо, не забудьте сделать это, - он ему скоро понадобится.
Чтобы войти в Башню Нидо, вам придется использовать динамит, а поскольку эта
башня находится далеко от города, не забудьте взять escapipe и telepipe. Будьте готовы к встрече с такими монстрами, как Waspy и Buzzer.
В Башне Нидо вы найдете еще немного денег, а также Dimate и Trimate. Проходя через третий уровень башни, будьте предельно внимательны - вы можете попасть в засаду, устроенную двумя Бластерами (а монстры, нападающие из засады, атакуют первыми, что вполне естественно), а эти мерзавцы вполне могут перебить всю вашу команду. Если вы наткнулись на компанию, состоящую из Бластера и двух Вортексов, в первую очередь атакуйте Бластера, с остальными разберетесь позже. К счастью, такие смертоносные твари, как Бластеры, попадутся вам только на третьем уровне башни.
Вам придется неоднократно перебираться с уровня на уровень, пока вы не найдете центр Третьего уровня, где вас дожидается Тейт - дочка Дарум а. Когда вы найдете ее, покажите ей письмо. Она, разумеется, будет напугана и попросит вас отвести ее к отцу на Северный Мост. Но Дарум уже зарекомендовал себя как грабитель и убийца, его многие ненавидят и быть его дочкой стало опасно. Поэтому вам придется уговорить ее скрыть лицо чем-то вроде паранджи.
Сразу же после обнаружения Тейт используйте escapipe и telepipe, чтобы выбраться из башни и вернуться в Пасео. Сразу же сходите в Госпиталь, чтобы залечить раны, затем идите на Северный Мост. А если вам нужен настоящий прикол, попытайтесь продать Тейт в Магазине Инструментов.
На Мосту вы станете свидетелем жуткой драмы: завидев отца, Тейт побежит к нему, но забудет при этом открыть лицо. Дарум не узнает се и попытается ограбить. Когда она откажется отдавать имеющиеся у нее деньги, Дарум в гневе убьет ее. А когда до него дойдет, кого он только что прикончил, он впадет в отчаяние и покончите собой.
Опута
После этой трагедии вы сможете перейти на другую сторону моста и отправиться в город Опута. Там в Оружейном Магазине вы сможете купить Керамические Бруски для Ней за 1200 месет каждый, а также в Магазине Доспехов купить Fibergear cap для Рольфа и Рубо за 430 месет.
В Опуте вы также сможете изучить технику музицирования, но пока можете этого не делать - у вас еще будет время заняться этим. Но если вам все ж таки хочется стать музыкантом, попросите Уствестия поиграть для вас просто так. При помощи клавиш Вверх и Вниз вы выбираете мелодию, при помощи клавиши С вы можете послушать ее. Когда вам наскучит это занятие, вы можете прервать его, нажав на клавишу В. Число мелодий, которые сыграет Уствестия, зависит оттого, какую часть игрового мира вы обследовали - ведь мелодии являются звуковым сопровождением в различных локациях игры. Если вы не были в той или иной локации, то вы не услышите и звучащей там мелодии.
Жители О путы сообщат вам следующее: Лаборатория Биосистем находится на юге, Материнский Мозг контролирует лабораторию, что-то важное происходит в подвале лаборатории, однако спуститься в подвал можно только через дыру в полу одного из уровней лаборатории, в лаборатории вывели растения, которым для того, чтобы расти почти не требуются дожди, созданный там Звездный Туман залечивает раны, а Лунная Роса лечит душу.
Возвращайтесь в Пасео с помощью станции телепортирования и идите домой. А там вас ждет еще один гость, вернее, гостья, которая хочет быть членом вашей команды. Ее зовут Эми, она доктор, в совершенстве владеющая медицинской техникой. Как боец она почти никуда не годится, зато умеет быстро лечить раны - неоценимый навык. В момент, когда она присоединится к вам, у нее Углеродный Скафандр, Скальпель и Ботинки.
Лаборатория Биосистем
Решите, стоит ли давать новое имя Эми, а затем снова отправляйтесь на охоту на монстров, чтобы позволить новому члену команды набраться опыта, а заодно и подзаработать денег на ее экипировку. В Опуте купите для нее Fibercape, Fibergear и Silentshot. Постарайтесь, чтобы она как можно быстрее набрала 6-ой уровень (а еще лучше - 8-ой, но это в том случае, если у вас вагон терпения и вы никуда не торопитесь).
После чего можете смело отправляться в Лабораторию Биосистем. Прежде чем входить туда, поохотьтесь на монстров, блуждающих в окрестностях Лаборатории, чтобы еще больше поднять уровни членов команды. Если вы запасетесь терпением, вы можете «докачать» Эми аж до 9-го уровня, тогда она сможет применять технику Sar, которая весьма вам пригодится в трудных ситуациях. Во время боя Эми лучше держать где-нибудь сзади, чтобы остальные члены команды ее прикрывали, - помните, боец она никудышный.
Деревья и фермы не дают пройти от Опуты к Лаборатории напрямую, так что вам придется долго блуждать среди речных притоков. Чтобы не заблудиться (а заблудиться здесь проще простого), используйте карту Моты.
Котла вы доберетесь до Лаборатории, вам опять придется использовать динамитную шашку, чтобы пробраться внутрь. Лаборатория состоит всего из трех уровней-этажей, не считая подвала. Но хоть Лаборатория и невелики по своим размерам, разного рода монстров и ней более чем хватает - вас ждут встречи с Pinchani, Mushroom, Stinger, Kite Dragon и Insecta. Кроме того, вы снова встретитесь с Бластерами.
На втором уровне вы сможете отыскать Скальпель, Противоядие и Звездный
Туман.
Звездный Туман восстанавливает очки жизни у каждого из персонажей до максимальных значений, но не стоит использовать такую полезную вещь при первом попавшемся случае - подождите, пока положение станет по-настоящему критическим. На третьем уровне вы найдете еще одну динамитную шашку. Пройдите через весь этот уровень, пока не найдете еще одну дверь, открыть которую можно только с помощью динамита. За этой дверью вы найдете дырку, ведущую в подвал.
Подвал Лаборатории не слишком уютное место хотя бы по той причине, что пол в повале кое-где находится под током высокого напряжения. Стоит любому персонажу наступить на оранжевую плитку, и он получаст удар током, а вся команда получает повреждения.
Держитесь восточной стены проходов, ведущих с запада на восток, таким образом вы сможете долго не наступать на оранжевые плитки. В контейнерах вы обнаружите Trimate, Противоядие и Выстрел Ядом. В северо-восточной части уровня вы найдете устройство, напоминающее компьютер, со всех сторон окруженное оранжевыми плитками.
Встаньте прямо перед этим устройством и нажмите на клавишу А. Вы нашли записывающее устройство Лаборатории Биосистем. Как только эта штуковина окажется в вашем распоряжении, используйте Escapipe и Telepipe, чтобы сначала выбраться из башни, а затем вернуться В Пасео.
Расшифровка Записей на записывающем устройстве
Подлечитесь в госпитале, а затем идите в Центральную Башню, чтобы вручить записывающее устройство Командующему. Командующий похвалит вас за прекрасно выполненную работу. А затем он выскажет весьма любопытную мысль - с тех пор, как Материнский Мозг взял на себя заботу об окружающей среде Моты, ее жители превратились в слабые и ничем не интересующиеся создания. Об этом высказывании начальника вы вспомните в самом конце игры.
Командующий отправит вас повидаться с Библиотекаршей, которая сейчас заканчивает расшифровку записей устройства, которое вы принесли. Она расскажет вам о том, что катастрофа в Лаборатории произошла два года назад из-за перегрузок в энергосетях - внезапно в энергосеть Лаборатории поступило огромное количество энергии от Климатрола (системы управления климатом). В итоге, одно из создаваемых в лаборатории существ превратилось в форму жизни, которая вообще не может существовать в природе. Остальные формы жизни - вполне естественные - были брошены на произвол судьбы. Библиотекарша точно проследила, откуда произошла утечка энергии и посылает вас в это место, чтобы вы выяснили, что именно послужило ее причиной. Кроме того, она даст вам Трубу-Ключ, с помощью которого вы сможете пересечь Западный Мост.
Надеемся, ВЫ еще не успели использовать Звездный Туман. Если он у вас еще есть, сдайте его на всякий случай в Камеру Хранения в Центральной Башне - потом он вам ещё пригодится.
Возвращайтесь домой, там вас как раз дожидается новый гость. Его зовут Хью - он биолог, прекрасно владеющий техникой нанесения ран, выведения из строя и полного уничтожения враждебных биомонстров. Хью, конечно, весьма интересный, но не слишком полезный персонаж, за всю оставшуюся игру вы можете ни разу не воспользоваться его услугами. В тот момент, когда он присоединяется к вашей команде, у него есть Углеродный Скафандр. Скальпель и Ботинки.
Решите, давать ли Хью новое имя и вообще, стоит ли брать его с собой. Если вы решили, что специалист по монстрам вам не помешает, идите на новую охоту на монстров, чтобы дать новому члену команды набраться опыта. А также не забудьте купить для него Fibercoat, Fibcrgear и Керамический нож. Если у вас есть Выстрел Ядом и Скальпель, которые вы взяли в лаборатории, Хью сможет использовать их.
Когда вы попадете на мост над Западной Рекой, используйте Трубу-Ключ и дверь автоматически отроется. Вам не придется использовать Трубу-Ключ второй раз - дверь так И останется открытой. Зема - первый город, который вы посетите во Второй Фазе игры: вам придется разыскивать Башню Климатрол. А вы уверены, что прочитали про Климатрол нужную информацию в библиотеке в самом начале игры?
Кто бы только знал, как тяжело мне писать эту статью! Ведь мало того, что данный ролевой сериал является моим однозначным фаворитом, так ещё и именно с «Phantasy Star 2» состоялось моё знакомство с удивительным миром японских, да вообще, ролевых игр, и началось моё увлечение этим чудесным жанром. А первая РПГ, как и первая любовь, не забывается, хе-хе. И неизменно чувствуешь, казалось бы, ничем уже (по прошествии почти пяти-то лет) не объяснимый душевный трепет, когда слышишь (или читаешь) эти два слова, сливающиеся в таинственное и прекрасное для множество РПГ-фэнов словосочетание – Phantasy Star … снова сжимается сердце при воспоминании о красивом и трагичном, бесподобном сюжете, и сколько приятных воспоминаний, словно лица старых друзей, с которыми эта тупая ролевуха, с дурацким сюжетом и хреновым ведущим, называемая «Real-Fucking Life», навсегда духовно или физически разъединила, будят эти странные для славянского уха имена – Rolf, Nei, Rudo, Kein, Ami, Shir…
Кто-то скажет, мол, вот, замучила паренька ностальгия по безвозвратно ушедшим счастливым денёчкам беззаботной юности, и, отчасти, он будет прав. Но лишь отчасти, так как игра и в самом деле хороша! Она не идеальна, и в ней есть несколько недостатков, которые могут серьёзно затруднить получение несравненного удовольствия некоторым геймерам-неженкам, избалованным простотой и доступностью многих современных игровых проектов, но в любом случае, «Phantasy Star 2» является настоящей классикой, которая на самом деле не стареет, и у меня нет сомнений, что и дети сегодняшних ролевиков, через пять-десять лет будут с сияющими от восторга глазами сидеть, не забывая время от времени вернуть на место нижнюю челюсть, перед мониторами, играя в очередной римейк старой-доброй «Phantasy Star 2» !
КАК ВЫГЛЯДИТ и КАК ЗВУЧИТ:

В своё время, играя на приставке, графическое оформление «Phantasy Star 2»
мне казалось, мягко говоря, скромным. Однако всё познаётся в сравнении, и теперь после того как я ознакомился более чем с полусотней шестнадцатибитных РПГ, должен отметить, что на самом деле графика вовсе не так плоха, как мне казалось. Более того, если вспомнить год выхода игры, то можно сказать что программисты из SEGA
постарались на славу! Ведь это была действительно первая полноценная ролевая игра для первой полноценной шестнадцатибитки. А теперь посмотрите на скриншоты и вспомните то безобразие, которое представляли из себя в визуальном плане игры той же Square. Вспомнили?
Хотя, конечно, чувствуется, что разработчике торопились, стремясь выпустить игру к моменту появления на прилавках Мега Драйва, и некоторые вещи, в том числе и в игровом процессе, остались несколько недоделанными. Так, к примеру, все без исключения бои проходят на одном и том же экране с неизменным чёрным фоном, спецэффекты предельно просты, да и цветовая палитра довольно-таки бедновата, но зато в том, что касается прорисовки и дизайна персонажей, как героев, так и супостатов, во время боя, здесь претензий быть не может. Прорисовку такого уровня и качества нам могут продемонстрировать, пожалуй, только , и последние РПГ на SNES.
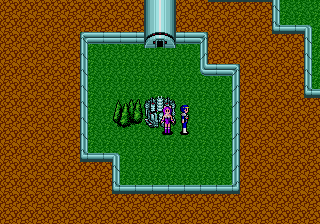
Звуковые эффекты подобны графическим, то есть, выполнены исходя из принципов минимализма. А вот с музыкальным сопровождением ситуация более сложная. Отношение к оному складывается прямо скажем неоднозначное. С одной стороны есть просто отменные вещички, вроде завораживающей, таинственной темы на заставке, а есть и довольно убогий примитив и откровенная халтура. Лучшая составляющая большинства треков, – это сделанная на редкость качественно партия ударных. А вот с толковыми мелодиями большой напряг.
СЮЖЕТ:
Теперь речь пойдёт о тех вещах, из-за которых я собственно и стал, горячим и верным поклонником «Phantasy Star 2» . Навороченный, эпический по масштабам сюжет, уникальная атмосфера созданная на удивление органичным сплавом элементов фэнтэзи и научной фантастики (не могу удержаться и не пнуть по этому поводу последние части Final Fantasy , где подобный эксперимент, на мой взгляд, провалился), и великолепно проработанная Вселенная, – являются характерными особенностями для всех игр серии. Безусловно, наиболее выдающейся в этом плане, причём не только в рамках сериала, но и вообще в жанре, стала четвёртая часть, но специфика сюжета и атмосферы именно «Phantasy Star 2» подействовала на меня так, что они побудили во мне желание, нет, – настойчивую необходимость, написать фэнфик «по мотивам». Что, в общем-то, неудивительно, так как и сама SEGA выпустила восемь текстовых ролевиков, о жизни персонажей до начала развития основной сюжетной линии. Кстати, пора бы уже о ней немного рассказать.

Итак, действие эпопеи происходит в звёздной системе Альго, что в Туманности Андромеды. Каждую из трёх вращающихся вокруг звезды планет, Palm, Mota, и Dezo населяет разумная гуманоидная раса. Жители Пальм вполне могут быть причислены к homosapiens, и как следствие были намного более развиты в технологическом плане (хотя возможно им просто повезло, – из трёх планет только Пальм был наиболее благоприятна для обитания, Мота – практически лишённая плодородной почвы бесконечная пустыня, Дезо, – и вовсе царство вечной мерзлоты). Уже к началу первой части «Phantasy Star»
, события которой происходят за тысячу лет до событий второй, люди в системе Альго освоили космическое пространство, сделали межпланетные перелёты регулярными и безопасными, и, следуя свойственным человеческой расе традициям, колонизировали и Моту и Дезо. Правда, на этот раз обошлось без обычного в подобных случаях геноцида слаборазвитых аборигенов.

История «Phantasy Star 2»
начинается спустя тысячу лет после свержения сурового тоталитарного режима тирана Lassic`а, юной воительницей Alis, имя которой теперь прославлено на века (и в самом деле, в четвёртой части игры, действие которой происходит ещё через тысячу лет, Алису помнят и любят, слагают о ней легенды…). После этого, Альго не знала ни крупных военных конфликтов, ни социальных потрясений, напротив цивилизация людей переживала невиданный подъём, – с помощью сложных ирригационных систем, а также искусственного изменения климата Моты, эта вечная пустыня превратилась в настоящий благодатный край для фермеров и соскучившихся по первозданной природе в железобетонных джунглях Пальма. На Дезо же были обнаружены богатейшие месторождения самого твёрдого материала в галактике, – Лакония, для добычи которого в глубоко в недрах планеты был построен огромный подземный город. Но главным своим достижением люди считали Mother Brain, – суперкомпьютер, на который были возложены множество важнейших функций, – от расписания полётов и контроля за электроэнергией, до управления системами искусственного климата и государственным планированием. Фактически, всю полноту власти над собой люди передали надёжному, справедливому, никогда не совершающему ошибки Материнскому Мозгу, и правительственные чиновники занимались лишь претворением в жизнь полученных от него команд и рекомендаций. Казалось бы, свершилось, – сбылась извечная мечта сотен величайших философов о построении идеального общества, без классового угнетения, дискриминации, и социальной несправедливости, но, как всегда, у любой медали есть и обратная сторона. Техногенный путь развития притупил остроту естественной борьбы за выживание, а появление Материнского Мозга окончательно сделало её первобытным атавизмом, абсолютно бесполезным во времена всеобщего благоденствия. Каждое новое поколение становилось всё более изнеженным и неспособным к преодолению серьёзных трудностей, которые рано или поздно должны были начаться при таком подходе к жизни. И, на исходе тысячелетия,они начались. Катастрофа на Дезо, когда из потревоженных людьми глубин вырвался губительный газ, приведший к гибели тысяч поселенцев, мутационных процессам в местной фауне и закрытию колонии. Появление множества криминальных группировок терроризирующих беззащитное население окраинных городов на Моте. Несчастный случай, приведший к прекращению работы Биолаборатории, где выводились безобидные породы животных, наличие которых необходимо для нормального функционирования искусственного климата планеты. Повышение температуры за последние несколько лет привело к снижению плодородности почв, засухам и угрозе голода. И, наконец, главная проблема, – безмозглые травоядные Биомонстры стали пожираться неизвестно откуда взявшимися агрессивными тварями, не боящихся нападать даже на вооружённого человека. Их численность достигла такого уровня, что выходить за пределы городов на Моте отваживаются лишь немногие. Для выяснения возможных причин этой напасти, Главнокомандующий планеты отправляет своего лучшего агента, Рольфа, уже имевшего в прошлом достаточный опыт борьбы с новыми Биомонстрами, взакрывшуюся Биолабораторию, с чего собственно и начинается сама игра.
ИГРА:

Вместе с Рольфом в путь отправляется Nei, – очаровательнейшее создание женского пола, являющееся результатом запрещённых экспериментом по скрещиванию ген человека и Биомонстров, на что явно указывают её ушки, которые что называется на макушке, хе-хе. Семь месяцев назад Рольф спас её от неминуемой гибели от рук озверевших горожан, и взял её к себе, заботясь о ней, и воспитывая, словно старший брат. И теперь, получив задание, Рольфу хочешь-нехочешь, но пришлось взять её с собой, тем более что и сама Ней на этом настояла. Впрочем, жалеть об этом ему не придётся, так как Ней окажется не только неплохим врачевателем, но и просто великолепным бойцом, набирающим уровни к тому же в два раза быстрее (что неудивительно, учитывая особенности её метаболизма, – немногим более чем за полгода, из маленькой девочки Ней превратилась в развитую девушку лет двадцати).
Монстры атакуют по давным-давно всех задолбавшей системе случайных боёв, и драться придётся часто, да ещё и помногу, так как не надейтесь завалить чудище с одного-двух ударов, – иногда может понадобиться не меньше десятка. Это добавляет поединкам известной глубины, но и увеличивает сложность прохождения, так как зачастую игра сводится к скурпулёзному исследованию лабиринтов, которых тут два с лишним десятка, отличающихся невероятной сложностью и замороченностью, и могут потребовать не один час, и это при регулярных атаках совсем не хилых тварей! Прибавьте к этому возможность сохраняться исключительно в городах (если конечно Вы не найдёте секретного Visifona), и ограниченное двумя десятками предметов багаж, Вы поймёте, почему я не советую садиться за «Phantasy Star 2» , тем, кто не готов потратить на неё минимум часов сорок (потому что когда втянетесь, будет уже поздно, – остановиться очень, очень сложно).
Уже довольно скоро к Рольфу и Ней, присоединяется профессиональный охотник на Биомонстров, – Рудо. Его семья была растерзана одним из этих чудовищ, и теперь ему чертовски хочется узнать, кто или что стоит за их появлением. Со временем, когда Рольф достигнет определённых успехов, и истории о его приключениях разойдутся по всей планете, к нему в команду придут ещё пять человек, – медсестра Эми, охотница Анна, биолог Хьюго, механик Кейн, и воровка Шир. Каждым из них движут свои мотивы, но все вместе они готовы идти до конца в своём безнадежным, казалось бы, крестовом походе против таинственной угрозы, нависшей над системой Альго.
ОСОБЕННОСТИ/ЗАКЛЮЧЕНИЕ:
Ещё раз признаюсь в том, что я без ума от «Phantasy Star» . Хотя бы потому, что это была одно из очень немногих художественных произведений, и книг, и фильмов, и игр, и аниме, кульминационные моменты сюжетов которых, действовали на меня настолько сильно, что впечатления не тускнеют и по прошествии лет. Особенно это касается концовки второй части,… Я подозревал, конечно, что эта пропитанная каким-то фатализмом атмосфера отчаяния присутствующая в игре должна вылиться во что-то по настоящему потрясающее воображение, но такое…
Браво сценаристам Сеги, – я был в шоке не меньшем чем после просмотра End of Evangelion …
Written By : STARK
Фаза II: Климатрол
Зема
Следующий ваш пункт назначения — город Зема. Путь в этот город начинается с моста, через который вы прошли с помощью Трубы-Ключа. Из разговоров со встречными людьми вы узнаете следующее: они любили в молодости кататься в морс на реактивных скутерах, но появление телепортов сделало скутеры абсолютно ненужными; аборигены Моты (маленькие создания в желтых балахонах) просто обожают крайне вонючую свалку мусора Ророн, расположенную на юге полуострова: посредине озера находится башня.
Используйте Ryulca, чтобы телепортироваться обратно в Пасео, и идите домой. Там ВАС ждет ещё одна гостья — Анна. Она является защитницей жителей города от охотников, которые пошли по пути зла. Она владеет очень редкими техниками боя, и, возможно, она лучший боец во всей игре. В тот момент, когда она к вам присоединилась, у нее есть Headgear, Fibercape и Ботинки, кроме того, у нее есть оружие — Бумеранг.
Ророн
Решайте, давать ли новое имя Анне. Возьмите ее поохотиться на монстров, чтобы она набралась опыта и «поднакачала» свои характеристики. Вам придется купить для нес достаточно дорогое оружие и экипировку, так что отправляйтесь поохотиться в Ророн, убедившись, что вы взяли с собой медикаменты. Заработайте достаточно денег, чтобы купить в Оружейном Магазине и Магазине Доспехов в Земе следующие веши: Ботинки для Рольфа и Эми, Титановый Шлем для Рубо, Эми и Анны, Titanimet и керамический меч для Рольфа, два Slasher для Анны, если в вашей команде есть Хью, купите и ему Титановый Шлем, ботинки, лазерный нож и Зеркальный Щит. В Ророне вы отыщите пушку для Рубо, а также еще один Керамический Брусок, который потом сможете продать, благо такие бруски у вас уже есть. В самом конце уровня вы встретите двух жителей Моты, которые похвастаются, что сделали реактивный скутер, и предложат вам посмотреть, как они катаются по океану.
Будьте осторожны — здесь водятся новые типы биомонстров — Rot Wood, Terakite, Slug Mess и Squat. Slug Mess может залечивать свои раны и убить его не так-то просто. Squat обожают плеваться в вас ядом. Непосредственного ущерба яд не наносит, но вы не можете лечить раны при помощи каких-либо медикаментов, пока действие яда не пройдет. Чтобы вылечиться от отравления, вам понадобится или добраться до больницы, или воспользоваться Anti Technique или Противоядием.
После знакомства с любителями покататься на скутере используйте Escapipe или технику Hinas, чтобы выбраться из Ророна. Выбравшись оттуда, вы найдете на берегу реактивный скутер слева оттого места, где были местные жители. Потратьте некоторое, не очень продолжительное, время, чтобы научиться пользоваться скутером, и готовьтесь продолжить свой путь.
Куери
Используйте карту Моты, чтобы отыскать путь к городу Куери. Будьте осторожны — на пути к этому городу вам повстречается несколько мерзких и опасных созданий. Жители Куери сообщат вам следующую информацию о том, что творится в океане:
— посреди океана находится остров, который называется Узо;
— предки местных жителей когда-то работали в морских глубинах;
— океан и озеро связывает подземный не то тоннель, не то канал;
— во всяком случае, в одном месте в океане вода все время меняет цвет на цвет воды озера.
Кто-то упомянет о том. что Материнский Мозг пятьдесят пять лета назад запретил подводные работы.
Очень важное место в Куери — Дом Профессора. Профессор расскажет вам о дереве Маруэра на острове в море, оно производит огромные количества кислорода, и ему нужны листья этого дерева, чтобы сделать специальное устройство, которое позволит вам дышать под водой.
Используйте Ryuka (одна из техник Рольфа), чтобы вернуться в Пасео. Оказавшись в столице, идите домой. Конечно же, там вас дожидается еще один гость — Кейн, грабитель затонувших судов. Он тоже хочет стать членом вашей команды. Кейн сразу признается, что из него выйдет довольно слабый борец с биомонстрами, но он может как чинить, так и быстро выводить из строя любых роботов и любые механизмы. Хотя этот парень и не является прекрасным бойцом, но дерется он лучше Хью, хотя и хуже, чем Рудо и Анна. Наибольшую пользу он принесет вам позже, когда овладеет методами и способами борьбы с вражескими роботами. В тот момент, когда он присоединился к вам, у него есть Кинжал, Fibercoat и Ботинки.
Решайте, стоит ли давать Кейну другое имя, а также стоит ли брать его с собой, или лучше пока оставить его дома.
Пиата
Перед тем как отправиться искать остров Узо, стоит посетить еще один город. Вам теперь придется оседлать реактивный скутер и отправиться на юго-восток Моты. Около мыса, далеко вдающегося в океан, есть три острова. Остановите свой скутер на этом мысе и поищите небольшие пешеходные мостики через речные притоки. Будьте осторожны — на пути вам встретятся такие монстры, как Pug Kill, Wolfang, Rcpiilc, Fanbite, and Head Rot. Вскоре вы попадете в город Пиата.
Местные жители расскажут вам об ужасной катастрофе — десять лет назад здесь упал космический корабль из Дезо, катастрофа унесла жизни всех пассажиров. В результате, Материнский Мозг запретил все космические полеты за пределы Алго. Вы также узнаете, что в те времена, когда люди считали Космические Полеты безопасными, космодром находился рядом с Пиатой, отсюда за пределы Моты улетел последний космический корабль, а ТО, ЧТО осталось от космического флота, теперь ржавеет в доках. Обратите внимание на маленького мальчика, который наивно интересуется — как могут случаться катастрофы, если Материнский Мозг за всем следит. А какому-то старику кажется, что он помнит ваше имя, — он считает, что вы прилетели на последнем космическом корабле.
Используйте Ryuka или станцию телепортации, чтобы вернуться и Пасео. Полечитесь в госпитале и возвращайтесь домой. Там вас дожидается сше одна гостья — последний член вашей команды. Ее зовут Шир Голд — она воровка и хочет присоединиться к вам по той простой причине, что считает — в вашей компании ее ждут веселые и забавные приключения. Она охотно признает, что ей плевать на действующее на Моте уголовное законодательство и ее интересуют только приключения. Но при всем её легкомыслии и наплевательскому отношению к закону и порядку, она весьма сильный боец. Переименовать ее нельзя. На тот момент, когда она присоединилась к вашей команде, у нее есть Кинжал, Углеродный Скафандр и ботинки.
Теперь можете немного развлечься. Идите с Шир в оружейный магазин, но не вздумайте ничего там покупать — вы ведь не забыли, что Шир не любит, когда платят за то, что можно взять за так. В магазине Шир исчезнет, а найдете вы ее у себя дома — проверьте се список предметов, и вы убедитесь в том, что воровать Шир действительно умеет. Точно такая же история произойдет и в магазине доспехов.
Шир спионерит следующие виды доспехов: Серебряные Короны (эта штука куда мощнее Титанового Шлема), Бриллиантовые Короны (ещё более сильная вещь) для себя, Эми и Анны, Gr Sleeves (вещь совершенно ненужная вам сейчас, но вы можете ее продать)и Shuneboots для себя и Анны. Если вы решили продать часть ее добычи, то Серебряные Короны стоят 2300 месет, a Shuneboots — 3750.
В Оружейном Магазине Шир может украсть либо только один кинжал, а может и Лазерный Нож, Боевой Лазер и Огненный Посох. Лазерные ножи — отличное оружие для одной руки. Вы можете вооружить Шир двумя ножами, а можете продать их по 2200 месет за каждый. Боевой Лазер — тоже прекрасное оружие, отдайте его Рубо или Кейну, или продайте за 3100 месет. Огненный Посох стоит совсем немного, но он чуть более сильное оружие, чем лазерный нож, а для его использования необходимо владеть техникой Foi.
Пользоваться этим оружием может только Эми, если выдадите ей дна таких посоха, она станет удивительно сильным бойцом, почти таким же как Ней, и пока вы не встретите особо сильных монстров в самом конце игры, о Эми можно не беспокоиться.
Во время продажи предметов в Магазине Инструментов Шир тоже может украсть что-нибудь по мелочи — например, Hidepipe или Trtimate. Запомните, чтобы повысить вероятность успешного воровства, поступайте примерно так — продайте один предмет и выходите из магазина, и так несколько раз.
Не надейтесь, что вы решите все свои материальные проблемы за счет Шир — проще, чем ждать пока она что-либо совершенно случайным образом украдет, пойти наубивать кучу биомонстров, получить за это кучу денег и купить то, что вам надо.
Вскоре вам удастся добиться оптимального соотношения оружия и доспехов для каждого члена команды. В первую очередь, постарайтесь сделать это для бойцов, а лишь затем для всех остальных (тем более если вы не взяли их на охоту на монстров).
Когда Шир достигнет 10-го уровня, она сможет украсть такой ценный предмет, как Visiphone. Впрочем, ценность он представляет лишь для немногих владельцев фирменного картриджа, позволяющего записываться — Visiphone даст этим счастливчикам возможность записываться в любом месте игры. Шир сопрет эту штуковину в Камере Хранения, которая находится в Центральной Башне.
Узо
У Ней уровни растут быстрее, чем у всех прочих персонажей, и к этому моменту у нее должен быть уже 20-ый уровень. К тому же у нее, Рольфа, Рудо и Эми должны быть вес необходимые им виды оружия и защиты. Когда у каждого из них будет 13-ый или 14-ый уровень, можете приступать к охоте на острове Узо.
Обязательно включите в команду Рудо и Эми. Купите Hidapipe, а также Dimate и Trimate в Пиате. Возвращайтесь в Пасео и прогуляйтесь до Северного Моста. Используйте Hidapipe при выходе из Пасео и биомонстры не будут вас беспокоить до тех пор, пока вы не доберетесь до реактивного скутера на берегу (вне зависимости от того, какое подземелье или какой город вы покинули, как только вы доберетесь до любой точки на берегу океана, вы сразу же обнаружите реактивный скутер).
Два из трех островов в юго-восточной части Моты по своим размерам больше, чем третий остров, и на них есть горы. Один из этих покрытых горами островов находится севернее соседнего большого острова, этот остров и является островом Узо. Когда вы остановите ваш скутер в правой части острова, рядом нажмите на клавишу А, чтобы прочитать часть важного сообщения.
После чего вы можете идти в эти горы и спуститься в подземелье.
Заранее предупреждаем, что карта острова очень запутана. Ваша задача — найти путь к семи деревьям в верхней части острова. Чтобы выполнить эту задачу, вам придется подняться по нескольким утесам по вырезанным в скале лестницам. Вы наткнетесь сразу на шесть тоннелей, которые можно использовать. Только одно из семи деревьев является деревом Маруера, все остальные вам не нужны. Вам необходимо найти настоящее дерево и взять с него лист. Какое же из них настоящее? Все очень просто — третье дерево справа. Вы должны встать прямо перед ним и нажать на клавишу А, чтобы взять один из листьев. Лишь два тоннеля из шести помогут вам найти нужное дерево. По пути к нему вас ждет встреча с новыми типами биомонстров — Glowstik, Burnwolf и Blockhed. Некоторые проблемы создаст вам и Catmen. Если вы хотите побыстрее расправиться с монстрами, то когда будете расставлять членов команды, поставьте Анну на место Эми.
Анна более сильный боец, особенно если она сражается с толпой биомонстров одного и того же вида при помощи двух Laser Slasher. Два огненных посоха Эми можно применить с тем же успехом, что и оружие Анны, но не забудьте, что она в первую очередь должна оказывать помощь раненым. А вместе Эми и Анна являются идеальной взаимодополняющей парой.
Когда вы, наконец, возьмете этот лист, покидайте Узо при помощи Escapipe или техники Hinas и отправляйтесь в Дом Профессора в Куери. Он попросит у вас лист и. получив его, приступит к изготовлению устройства, которое он назвал Marucra Gum (для чего предназначено это устройство, вы, наверное, еще не забыли).
Климатрол
Южнее «поддельного» острова Узо (т. е. очень похожего на него острова) на воде есть белое пятно. Направьте свой реактивный скутер прямо к этому пятну и остановитесь. Придется нырять в воду. Но у вас есть Maruera Gum — эта штука обеспечит вас количеством кислорода, вполне достаточным для того, чтобы по подводному проходу добраться до Климатрола.
В подводном проходе вы снова наткнетесь на оранжевые плитки, бьющие током, прекрасно знакомые вам по подвешу Лаборатории Биосистем (вообще-то, вода прекрасный проводник электричества и в реальной жизни вы бы долго около этих плиток не проплавали). К счастью, множество этих плиток можно легко обойти, держась южной стены в проходах, идущих с запада на восток. Из монстров вас ждет встреча с Slug Mess и Pug Kill.
Будьте предельно осторожны на первом уровне Климатрона. Чешуйчатые монстры не только опасны, но и предельно противны. Второй, третий и четвертый уровни очень легко пересечь, правда, время от времени вас будут атаковать настырные питоны. На третьем уровне в одном из контейнеров вы найдете Ленту из драгоценных камней, а на четвертом уровне, тоже в контейнере, отыщете Fibervest.
На пятом уровне находятся гигантские водные резервуары, в которых хранится дождевая вода Моты. Из монстров вы встретите здесь бластоидов — прекрасный источник денег и очков опыта. Бластоиды не наносят вам сильных повреждений, но они легко самовоспроизводятся. Если вы оставите в живых хоть одного бластоида (для этого не надо его атаковать, просто отбивайте его атаки), вам обеспечены стабильные поставки этих существ, которые не приносят особого вреда, а вместе с тем легко убиваются. Таким образом, вам обеспечена большая порция очков опыта и куча денег. Есть здесь и другие монстры, например, Head Rots, убить которых не так просто, как несчастных бластоидов.
На шестом и седьмом уровнях вы найдете Лазерный Брусок, Керамический Брусок и Серебряную Ленту, а также пару Ботинок с ножами и Сандалии — все эти предметы пригодятся Ней. Здесь вас поджидают очень серьезные монстры — Flarewolf, Cattang, Forest and Scaly. Вам придется использовать специальные наклонные спуски между шестым и седьмым уровнем, чтобы добраться до полезных предметов.
На Узо и в Климатроле вы можете легко набрать много очков опыта и поднять уровни всем членам команды. Когда Рольф достигнет 16 уровня, Эми — 15-го, Рудо, Анна и Кейн — 14-го, вы будете вполне готовы к тому, чтобы завершить возню с Климат-ролом. Если вы купили для Рудо Лазерную Пушку, не спешите сразу дать ото оружие ему в руки, но все же не забудьте взять ее с собой.
В нашей команде обязательно должны быть Рудо и Эми, купите для каждого из них столько Trimate, сколько они могут нести с собой. Используйте Hidapipe. чтобы всегда иметь свободный путь к реактивному скутеру и Пасео.
Двигаясь чрез Климатрол, вы вскоре достигнете центра самого верхнего — восьмого уровня. Как только вы достигнете его, используйте технику Res, которой владеет Ней, чтобы излечить всех членов команды (включая и Ней, разумеется) до полного запаса очков здоровья. Вооружите Рудо лазерной пушкой и, если вы счастливый владелец фирменного картриджа, сохраните игру при помощи Visiphone.
Поговорите с девушкой в центре уровня она выглядит как точная копия Ней. Она расскажет вам свою историю. Ее зовут Neifirst (Первая Ней), и она является продуктом биоэкспериментов (как и ваша Ней). Ученые попытались прикончить ее, когда эксперимент, но их мнению, закончился неудачно. Но Первая Ней сбежала из лаборатории, прихватив данные о своих ДНК. Чтобы отомстить тем, кто ее создал и хотел убить, она произвела стаи биомонстров, а также захватила контроль над Климатролом.
Однако у нес есть и «хорошая» часть сущности — она. по сути дела, разделена на два существа, и второй ее половиной является... да, вы угадали — Ней. Ней тоже наполовину человек, наполовину монстр. но если Первая Ней ненавидит свою человеческую часть сущности, то Ней ту
часть, которая ей досталась от монстров. Если Первая Ней желает уничтожить человечество с помощью биомонстров, то Ней готова умереть, чтобы не допустить этого.
Смерть Ней
Первая Ней уверена, что «добрая» Ней не сможет ее остановить и вызывает своего «двойника» на поединок. Сказав «Да», Ней соглашается сойтись со своим врагом в смертельной дуэли один на один. Но, увы, Ней не соперник такой сильной противнице. Первая Ней обстреливает свою соперницу напоминающими коготь снарядами, вылетающими из ее левой руки — этот вид атаки не столь опасен, а вот поток света, вылетающий из правой руки, действительно смертоносен. Первая Ней атакует раз за ход, но виды атаки меняются случайным образом.
Первая Ней наносит атаки с такой регулярностью, что Ней не успевает использовать Trimate, чтобы залечить раны. Если Первая Ней два раза использует свою правую руку, Ней должна иметь как минимум 155 очков жизни и 100 очков защиты, чтобы уцелеть. Она может гарантированно пережить две такие атаки подряд, если имеет 175 очков. Но результат схватки все равно предрешен — лаже если свершится чудо и вам удастся убить Первую Ней, ваша Ней все равно умрет — они с Первой Ней являются частью одного целого, и если Первая Ней умирает, Ней все равно также должна покинуть этот мир.
Когда Ней умрет, Рольф и вся команда метнутся к ней. Ней напоследок попросит не допустить повторения ошибки, совершенной людьми, создавшими се. Сказав это, она умрет. А Рольф поклянется отомстить за нее.
Первая Ней, как ни странно, благополучно пережила смерть своей «доброй половины» и Рольфу, Рудо и Эми придется сражаться с этим порождением беспечных ученых. У Первой Ней ни много ни мало 1400 очков жизни, она быстро восстановит все очки жизни, потерянные в битве с Ней. А вы можете использовать Лунную Росу, но все же не делайте этого без крайней необходимости.
Действия Рудо напрашиваются сами собой — создание заградительного огня из Лазерной Пушки. Рольф должен использовать свою технику Нафой до тех пор, пока не кончатся очки техники, а затем атаковать своим Лазарным Мечом, если без этого не обойтись. Эми должна использовать свою технику Dcban, а на следующем ходу технику Sashu. А затем использовать огненные посохи, если кто-то из членов команды получил серьезные раны, используйте Trimate, чтобы восстановить очки жизни.
Использование Анны вместо Эми, возможно, сделает более легкой победу над Первой Ней, но два Огненных посоха Эми наносят столько же повреждений, сколько и два Laser Slasher Анны. Но Эми во-первых, владеет специальными техниками, а во-вторых, может лечить раны.
Если Рольф, Рудо и Эми достаточно сильны и у них есть Керамическая Броня, то им удастся одолеть Первую Ней после долгого ожесточенного поединка. Когда Первая Ней, наконец, испустит дух, здание Климатрола начнут сотрясать толчки. Первая Ней убита и никто не контролирует огромные запасы энергии, которая вот-вот найдет себе выход.
Далее вы можете отложить джойстик в сторону и просто смотреть ролики. Из Климатрола после длинной серии взрывов вся накопленная вода вытечет в озеро. Рольф и вся остальная команда возвращаются в Пасео, прихватив с собой тело Ней — они надеются оживить ее в Лаборатории Клонирования. Но попытка оканчивается неудачей, — клонировать научились только людей, а Ней ведь не совсем человек. Опечаленный Рольф идет к Центральной Башне, отчитываться перед Командующим о проделанной работе.
Дезертиры
В Центральной Башне царит полный хаос. Озеро благодаря воде, вылившейся из Климатрола, вышло из берегов и ужасное наводнение грозит всей планете. Командующий говорит вам, что избежать катастрофы можно только открыв дамбы, и вы просите, чтобы это задание поручили вам (а кому же еще-то?). Кроме того, он сообщит вам, что правительство на Палм считает именно вас виновным за сбои в работе Материнского Мозга, но Командующий не собирается вас задерживать, а великодушно отпускает спасать планету. Вам предстоит открыть четыре дамбы. Подлечитесь в госпитале, продайте Vulcan Рудо. Ней погибла, но вы-то живы и вам еще нужно спасти планету. Возвращайтесь домой, чтобы провести ревизию своего имущества и приготовиться к следующей Фазе игры — Дамбам.
Фаза III: Дамбы
Рольф к этому моменту должен достичь как минимум 16-го уровня, Эми — 15-го, а Рудо, Анна и Кейн — 14-го. Они должны быть идеально экипированы для боя. Теперь, когда Ней погибла, вы можете рассчитывать только на трех союзников. Оставьте дома Эми и возьмите с собой Рудо, Анну и Кейна. Кейн к этому моменту уже должен обучиться технике ломания механизмов. Прежде чем отправляться в путь, зайдите в Библиотеку и прочитайте там все, что касается дамб.
Музыка
Отправляйтесь в Опуту, и найдете там Уствестия. Теперь вам надо освоить технику Музицирования. Уствестия почему-то не любит женщин — за обучение своему искусству он берет с женщин 5000 месет, а с мужчин только 2000. Однако вы сможете сэкономить и обучить из женщин только Анну. Если вы хотите сэкономить 3000 месет обучите только Кейна или Рольфа. Попросите Уставистия сыграть для вас мелодию под названием Mystery (Тайна) — это одна из самых красивых мелодий в игре.
Если у Эми осталось немного Trimate после той памятной схватки в Климатроле, передайте его Кэйну. В Пиате закупите как можно больше Trimate — дайте его каждому члену команды столько, сколько он может нести. Теперь идите в верхнюю часть Пиаты и найдите Башни Контроля. Теперь вы можете войти в башню, расположенную точно посередине.
Башня Контроля
Перемешаться по лабиринту Башни Контроля вы сможете при помощи системы наклонных спусков. Вам придется пользоваться ими, чтобы перебираться с первого на второй уровень и обратно. Вам нужно добраться до пульта управления, расположенного точно в центре второго уровня.
Вас будут преследовать и пытаться остановить роботы правительства. Из врагов вам встретятся роботы Whistle, Mctalman, Mazgamma и Polezi. Кроме того, вам может попасться еще и Mechoman. Каждый из роботов намного сильнее любого из биомонстров (за исключением Первой Ней, конечно). Но в вашей команде есть Кейн, который умеет управляться с этими железками. После каждого поединка вы сможете залечить раны с помощью Trimate.
Когда вы доберетесь до пульта управления, вам придется использовать технику Музицирования. Если вы коснетесь пульта, не используя эту технику, вы просто телепортируетесь за пределы Башни. Использование этой техники позволит вам воспользоваться пультом, и вы услышите, где откроется дверь. Дверь отроется в стене за пультом. Пройдите через нее, и вы увидите четыре панели. Исследуйте их, и вы найдете четыре разноцветные карты: Красную, Желтую, Голубую и Зеленую. Ни один из членов команды не сможет взять больше чем одну из этих карт, но таким образом у них останется больше места для таких полезных вещей, как Trimate.
У вас в руках оказались ключи, позволяющие открыть все четыре дамбы (каждая ИЗ них соответствует одному из цветов). Открывать их придется в следующем порядке — сначала Красную, затем Желтую, Голубую и Зеленую. Каждую следующую дамбу открыть будет сложнее, чем предыдущую.
Единственных роботов вы встретите на пути к реактивному скутеру — это роботы Whistle — наиболее слабые из всех. Так что ничто не помешает вам отправиться к Синей Дамбе.
Красная Дамба
Поднимайте по южной реке, заключенной в тоннель, пока не достигнете Красной Дамбы. Встаньте перед дверью и используйте Красную Карту, чтобы войти внутрь. Красная Дамба разбита на три уровня-этажа, каждый из которых разделен на две секции — верхний и подвал. Будьте осторожны — здесь встречаются роботы Eyesore.
От спуска, расположенного у самого входа, следуйте на северо-запад, а затем спускайтесь в подвал. Затем идите на юг и северо-запад. Спуск приведет вас на первый уровень. Идите на юг и поднимайтесь на второй уровень. Возьмите Fire Slasher, который вы найдете в контейнере, и спускайтесь назад на первый уровень. Идите на запад и спускайтесь в подвал. Идите на север, затем на восток и поднимитесь на уровень один. Идите на запад и поднимитесь на второй уровень. Вас ждет длинная прогулка через весь второй уровень, начинаете вы с юга, затем идете на восток и северо-восток, пока не наткнетесь на большой провал. Идите на восток, и вы увидите хитрый проход между несколькими провалами. Когда вы пройдете по нему, наткнетесь на контейнер. Там вы
найдете Огненный Посох, после чего отправляйтесь на восток. Обойдите еще один провал и спускайтесь на первый уровень. Идите на юг и спускайтесь в подвал.
Затем идите на северо-запад, и вы обнаружите еще один контейнер. Внутри вы найдете Меч Анго, но не стоит сразу же использовать его. Это оружие исключительно мощное, но не дает никаких преимуществ в защите, в отличие от того же Лазерного Меча, которым вы вооружены теперь.
После того, как вы найдете Меч Анго, возвращайтесь к наклонному спуску и идите так далеко на запад, как сможете. Теперь идите на северо-восток, затем на восток и поднимитесь на первый уровень. Затем идете на запад, а затем на юг и поднимитесь на второй уровень. Отойдите на несколько шагов на юг, затем идите на запад, вы найдете Красный Компьютер и пульт управления. Используйте Красную карту. Пульт Управления, и вы откроете Красную Дамбу — южная река теперь переполнена водой. Возвращайтесь в Пасео и подлечитесь в Госпитале.
Желтая Дамба
Теперь вас ждет прогулка по западной реке, в конце которой находится Желтая Дамба. С помощью желтой карты откройте дверь. Пройдите мимо двух наклонных спусков, расположенных у самого входа, и идите к наклонному спуску на самом верху. Поднимитесь по нему. Идите на северо-запад мимо еще одного спуска, затем идите на запад к другому спуску. Поднимитесь по нему на третий уровень. Идите на запад, и вы найдете хрустальные доспехи, которые называются Crystanish. Дайте их Рудо или Кейну, возвращайтесь назад в верхнюю часть первого уровня, а затем поднимитесь по уклону, расположенному рядом. Южнее от того места, где вы очутились, вы найдете Escapipe. Возьмите эту полезную штуковину и идите на запад, а затем север вдоль стены. Вскоре вы найдете спуск в центр первого уровня.
С того момента, как вы оказались в центре, идти дальше будет легче (если не принимать в расчет роботов, конечно). Вы повстречаетесь с новыми видами роботов на Желтой Дамбе — Cooley 61, Twig Man и Firgamma.
Идите па чапал к очередному уклону, по которому поднимитесь на уровень два. Идите на северо-восток до очередного уклона и поднимитесь на третий уровень. Двигайтесь строго на юг и по очередному уклону поднимитесь
на четвертый уровень. По спиральному проходу двигайтесь к очередному уклону. Прежде чем воспользоваться им, сверните на север в небольшой проход, и на восточной стороне вы увидите контейнер на восточной стороне. Там лежит Янтарное Одеяние. Этот вид доспехов может носить только Хью, и он столь же прочен, как Титановый Нагрудник, кроме того, при использовании Янтарного Одеяния вы можете лечить рану и использовать технику Gires. Так что это в высшей степени полезная вещь, явно стоит прихватить ее с собой.
Возвращайтесь вниз по уклону и спускайтесь дальше. Вам попадется на пути Хрустальная Накидка для Анны. Возвращайтесь наверх и двигайтесь на восток по другому наклонному спуску. Вы попадете в маленькую комнату на третьем уровне, где лежит еще один контейнер. В нем вы отыщете Хрустальный Нагрудник для Рольфа. Степень защиты, которую дает этот вид доспеха, вполне достаточно для того, чтобы без опаски использовать Меч Алго. Кроме того. Хрустальный нагрудник, если вы используете его как простой предмет, даст вам возможность использовать технику Gra. После того, как Рольф надел этот доспех, можете смело вооружать его мечом Алго.
Возвращайтесь на уровень четыре, пройдите весь путь до восточной стены, затем идете на север. Продолжайте идти на север так далеко, как только сможете, а затем поверните на запад, а затем сверните на юг. Вы окажетесь в спиральном проходе, который заканчивается в центре третьего уровня — как раз там, где находится Желтый Компьютер. Положите Желтую Карту на панель. Вы услышите звук извергающейся воды — Желтая Дамба и западная река наполнена бурлящей водой.
Синяя дамба
По восточной речной трубе вы доберетесь до Синей Дамбы. Откройте дверь при помощи карты. Остерегайтесь роботов Pot Head, Van и Attmech. Только лазеры Кейна и Рудо могут нанести вам серьезные повреждения.
Идите через дамбу и поднимитесь на второй этаж.
Двигайтесь на юг и восток, доберитесь до третьего этажа. Потом на юго-запад, запад и север, чтобы оказаться на четвертом. Прежде чем подняться туда, пройдите немного на север и спуститесь на второй этаж. На юго-западе находится Механизм полумесяца. Этот шлем обладает мощью Механизма Титана и лечит вас подобно Янтарной одежде. Только Рудо может воспользоваться чудесным устройством.
Вернитесь к подъему на четвертый этаж. Недолгий путь приведет вас к пятому. На юго-востоке находится Шлем Шторма, устройство, обладающее силой предыдущего артефакта и позволяющее применять технику Гизан. Только Кейн может воспользоваться этим предметом.
На юге вы сможете спуститься на четвертый этаж. Пять ям расположены в шахматном порядке. В контейнере вы найдете Colorscarf. Этот артефакт может носить только Анна, и по мощности он не уступает Короне из драгоценных камней.
Спрыгните в юго-восточную яму, чтобы попасть на третий этаж. Напротив вас окажется контейнер со Снежной Короной. Возможно, это один из самых ценных предметов в игре. Защита, вызываемая Снежной Короной, распространяется на весь отряд. Отдайте артефакт Анне, она обладает достаточной скоростью, чтобы успевать активизировать шит в начале боя.
На юге от контейнера спуститесь на второй этаж. Идите на запал и еще раз спуститесь. На первом этаже вам предстоят несколько длинных переходов. Сначала на север и за угол, потом на юг и, наконец, на юго-восток. Поднимитесь на второй этаж. Перед вами окажутся два подъема. Воспользуйтесь тем, который находится на северо-востоке, тогда вы сможете-извлечь из контейнера Шарф Ветра, позволяющий применять технику Zan. Спуститесь и воспользуйтесь северо-восточным подъемом. Пройдите к северному концу дамбы и поднимитесь на четвертый этаж. На юге вы увидите большую яму. Обогните ее с востока и спуститесь на третий этаж. Идите на юго-запад, снопа поднимитесь. Вы окажетесь на другой стороне ямы.
В середине широкого квадратного отверстия находится платформа с синим компьютером. Идите на юго-запад и возьмите из контейнера устройство. Потом двигайтесь на восток, пока это будет возможно, и на север. Вернитесь на пятый этаж.
Идите на юг и запад, спуститесь на четвертый этаж. На юге находится спуск, ведущий в комнату с контейнером, в котором вы найдете Звездный Туман.
Возьмите его и вернитесь на пятый этаж. Идите на северо-восток, пока не доберетесь до ямы в форме буквы «Г». Спрыгните в нее и приземлитесь на платформе с синим компьютером. Вставьте в панель синюю карту.
Теперь вы можете покинуть синюю дамбу. Труба и ее ответвления заполнены водой. Вернитесь в Пасео. Подлечитесь в больнице. Продайте Titanigear Рудо, Titanimet Кейна и Корону Анны. Оставьте Звездный Туман в камере хранения Центральной Башни. Шарф Ветра прекрасно заменит Корону из драгоценных камней. Только Шир может пользоваться им.
Зеленая дамба
Вы попадете в зеленую дамбу через северную трубу. Здесь всего два этажа, но из всех дамб именно зеленая является самой опасной и трудной для прохождения. Вас ждут новые роботы: Heavysolid, Twigtall, Monstar и Kilgamma.
От входа идите на юг и поднимитесь на второй этаж. Семь спусков ведут вниз. Выберите ближний из двух, расположенных на западе. Вы окажетесь в области с единственным подъемом на западе. Воспользуйтесь им. На втором этаже вы найдете контейнер, в котором окажутся Рукава Правды. Этот предмет может лечить вас, как техника Gires. На северо-западе от контейнера находятся два спуска. Воспользуйтесь северным. Идите на запад и поднимитесь на второй этаж. На западе окажется спуск и проход, ведущий по внешней стороне дамбы. Идите на юг и воспользуйтесь следующим спуском. На первом этаже вы найдете Телетрубу. Пока вам не особенно нужен этот предмет.
Вернитесь к внешнему проходу. Двигайтесь по нему осторожно, если вы сорветесь, уровень придется начинать сначала. В конце карниза идите на восток и спуститесь на первый этаж. Пройдите еще немного на восток, потом на юг. В контейнере вы найдете щит Легис. Этот артефакт не слабее Зеркального Щита, кроме того, он лечит вас, как техника Gires.
Вернитесь к концу внешнего прохода. Идите на запад и юг. Справа вы увидите спуски, находящиеся один за другим. В контейнерах на севере и востоке лежат рукава, но сейчас они вам пи к чему. Воспользуйтесь спуском, стоящим к северо-востоку от остальных. В контейнере вы найдете Звездный туман. Возьмите его и вернитесь на второй этаж. Воспользуйтесь следующим спуском. Пройдите немного на север, а потом на запал. Поднимитесь на второй этаж. Идите на запад и север. Вы найдете зеленый компьютер. Вставьте в него соответствующую карту. Наводнение предотвращено!
Гаила
Три Вооруженных Глаза появятся перед вами сразу после того, как вы откроете последнею. дамбу. Огромные лазеры, стреляющие в течение трех туров, нанесут вашему отряду незначительный урон. Но потом один из роботов создаст вокруг вас плазменное кольцо, из которого вы не сможете выйти. Единственный способ избежать этой опасности — разделаться с врагом за три тура. К сожалению, похоже, что это невозможно.
В любом случае, вас захватят и доставят на спутник-тюрьму, курсирующий по орбите между Мотой и Пальмой. У вас нет ни предметов, ни специальных техник. Вдобавок, вы все еще связаны плазмой.
Отряд ходит по спутнику в поисках способа сбежать с него. Роботы пытаются остановить вас, а у бойцов нет оружия, чтобы противостоять им. По счастью, вы всегда можете отступить и не участвовать в сражении.
Внезапно тюрьму сотрясает взрыв страшной силы. Спутник с нарастающей скоростью движется в неизвестном направлении. Вам нужно срочно найти пульт управления.
Добравшись до компьютера, вы выясните, что спутник падает на планету Пальма и нет ни малейшего шанса остановить его.
Вокруг вес темнеет, и вы снова видите повторяющийся сон. Когда герой открывает глаза, перед ним стоит незнакомый мужчина. Команда находится на космическом корабле. Оказывается, звездный пират Тайлер успел спасти вас. Спутник по-прежнему несется к планете и, похоже, скоро от Пальмы ничего не останется.
Тайлер рассказывает про планету Дезо, на которой живет человек, знающий тайну Материнского Мозга. Потом пират доставляет команду обратно на Пасео. Все вещи и техника снова в вашем распоряжении.
Идите в Центральную Башню и поговорите с командующим. Выслушав ваши планы относительно планеты Дезо, он откроет вам доступ на вершину башни. Там стоит космический корабль. Проверьте свое снаряжение: вам предстоит опасное путешествие на ледяную планету.